More about custom plugins
Vertex shaders
So far we have worked on a plugin that has only a fragment shader, in a .fs file. The ISF standard also supports vertex shaders in .vs files, as used for example by the EdgeDetect plugin.
In ISF, only four vertices are ever passed in, which mark the corners of the canvas. So the use of the vertex shader is limited. Nonetheless, in the vertex shader you can do some smart optimizations by pre-calculating values that are similar for every pixel.
The EdgeDetect example uses an image kernel that is calculated in the vertex shader, so the calculation is done only once for each of the four vertices. Since the kernel values are then assigned to varyings, they are automatically interpolated per pixel when carried over to the fragment shader.
Multiple passes
The ISF standard allows an effect to do multiple passes of processing on a frame. The Bloom example uses multiple passes to render various blur levels to create a smooth aura around bright areas. A pass can also define a persistent buffer, storing the result of a frame for the next frame. Random Freeze is an example this.
Image inputs, or Side chains
The ISF standard allows an effect to define an image input type. In Videosync, an image input can be assigned the result of another track. In audio terms, the plugin then has a side chain input.
The easiest way to implement a side chain input in your plugin is to follow the CandyWarp example's modulation map parameter. These are the essential elements:
- In the
.fsfile header, make sure a parameter with type"image"is defined. - In the M4L interface, add the objects that generate the up-to-date dropdown with all track names, connected just like in the CandyWarp plugin interface.
- The keyword prepended to the trackSelector output needs to match the name of the image input as defined in the
.fsfile.
Videosync-specific ISF Features
- `BEAT``: The uniform float BEAT is automatically declared, and is set to the current Ableton Live time (in beats). This variable is updated once per rendered frame.
#VIDEOSYNC: The#VIDEOSYNCpreprocessor macro is automatically declared for ISF Shaders running in Videosync.
Example:
#ifdef VIDEOSYNC
  myTime = BEAT; // the uniform float BEAT contains the current time in Ableton Live, measured in beats, and is only available in Videosync
#else
  myTime = TIME; // the uniform float TIME is part of the default ISF spec and is set to the current rendering time (in seconds) of the shader
#endif
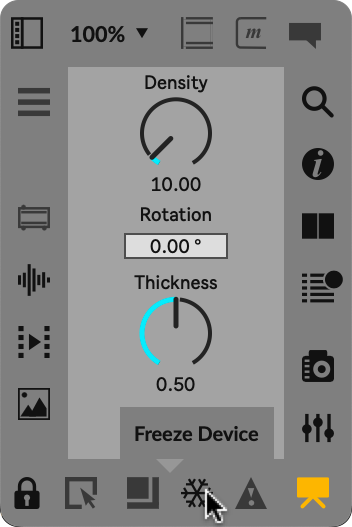
Freezing your plugin
Before distributing your plugin, make sure to Freeze it. This is done simply by opening it for editing and pressing the Freeze button. After saving the plugin, you will now be able to send the plugin folder to anyone who has Videosync for use in their Live Set.
However, there are two important things to know about freezing:
- All freezing does is include
videoDevice.maxpatand any of your own dependencies in your plugin. It does not store the shader files in it. So you will always have to distribute your plugin as the folder that contains the frozen.amxdfile and the shader.fsor.vsfiles. - One big issue with freezing an M4L plugin is the unfreezing. As soon as you unfreeze a plugin, Max will move all its contained files in a subfolder of your Documents folder. This means a copy of
videoDevice.maxpatis saved somewhere else than the Plugin SDK folder you are working from. This potentially causes issues if you download a new version of the Plugin SDK and expect that all your devices now use the new dependecies that come with it.
We recommend always keeping an unfrozen version of your plugin on disk. If you want to continue editing a device after you have frozen it, instead of unfreezing, always delete the frozen one and continue editing the original. If you distribute new versions of a plugin regularly, this can require some elaborate manual file management.
We make this process easier for ourselves by using git, a version control system. However using git can be a science on its own. If you are not familiar with it, you may prefer a manual process.
For more details about version and dependency management of Max for Live devices, there's some information in Ableton's Max development resources.
Plugins in racks
Plugins on rack chains behave exactly like on tracks, fully analogous to audio plugins. For example, the result of a rack chain is mixed with the other chains to the rack output based on the blend mode, taking the final alpha value of a device chain into account.
Troubleshooting and pending inconveniences
- If you suspect that something went wrong while working on the M4L interface, in Live, you can right-click the plugin title bar and select Open Max Window to be notified of any errors in your plugin interface while it is running inside of Live.
- After editing a plugin M4L interface, always make sure to shut down Max. If you restart Videosync while Max is still open after editing a plugin, the messages sent to M4L by Videosync may not arrive. This happens because Max takes over network input from M4L as soon as a plugin is opened for editing. Unfortunately, when the plugin is closed but Max stays open, Max does not return the network input control back to M4L, so Max needs to be closed to return back to normal operation.
- GLSL compile errors can sometimes be inaccurate or cryptically formulated. For example:
syntax error: #define- Problem: you may have
#define 2PI 6.283185in your code, a define starting with a numeral. - Solution: rename
2PItoTWO_PI
- Problem: you may have
- In ISF vertex shaders, the name of the built-in variable
isf_FragNormCoordcan be confusing. In vertex shaders, this variable simply holds the normalized x and y of the vertex, which can only ever be(-1,-1),(1,-1),(-1,1)or(1,1), scaled to between0and1. It is assigned to a varying, so it is interpolated and passed to the fragment shader where it serves as the normalized coordinate per pixel, hence the name.
Further reading
There are many good resources describing or demonstrating exciting ways to create an enormous diversity of real-time generated or modified images with shaders:
However, there are almost no resources describing the best choices for defining parameters that can be used effectively when composing or performing with video on a musical timeline. This is up to us to explore!