Blending
Click here to watch a video tutorial about blending.
Overview
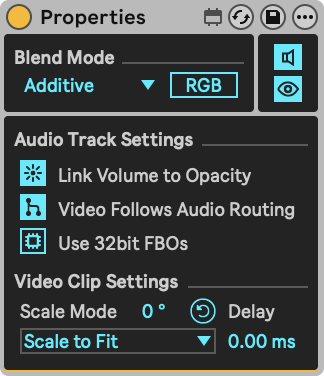
When tracks are mixed into the Main output or when chains are mixed together to form the rack output, they can be mixed in several ways. Which way depends on the Blend Mode setting in the Properties device.

There are several other factors to take into account:
- Tracks in Session View are blended in left-to-right order, so the left-most track is overlaid with the track on its right side using the overlaying track's Blend Mode. The result is overlaid with the following track, and so on. The same applies to the Arrangement View, but in top-to-bottom order.
- For some blend modes, like the default Additive blending, the order is irrelevant, since all values are added. But for others, like Subtract, the results can look very different depending on the order of the track in your Live Set.
- Group tracks work as expected. First the tracks within the group are blended, then the output of the group track will be blended with other tracks that are on the same level.
- In rack chains, the blend order is also from top to bottom.
Blending order
- Session View
- Arrangement View
- Rack Chains
Blend modes
Videosync supports the following main blend modes for tracks and chains:
- Additive: The default Blend Mode. Simply adds all colors of the underlying and overlaying images.
- Alpha: Draws the overlaying image over the underlying image. The underlying image is obscured, unless the overlaying image has transparency, for instance when the overlaying track is playing a video that has an alpha channel. The alpha channel determines what part of the underlying image is seen through the overlaying one.
- Crossfade: The overlaying image is faded in over the underlying image.
- Mask: The underlying image is seen only where the overlaying track is not black.
- Mask alpha: The same as Mask except that the underlying image is seen where the overlaying image is transparent, like with the Alpha blend mode.
Apart from that, Videosync contains the following artistic blend modes, that you may recognize from your favorite photo editing tool:
- Color dodge
- Color burn
- Multiply
- Difference
- Subtract
- Average
- Divide
- Exclusion
- Hue
- Saturation
- Color
- Luminosity
- Darken
- Linear burn
- Lighten
- Screen
- Linear dodge
- Overlay
- Soft light
- Hard light
- Vivid light
- Linear light
- Pin light
- Hard mix
This article doesn't yet cover how Additive blending acts when either the underlying or the overlaying track has an alpha channel. This is a special case that often gives unexpected results in most software that supports additive blending.
This topic will be discussed in more detail later. For now we want to mention that we have a custom approach that tries to act as natural as possible in all possible scenarios.
Blending methods
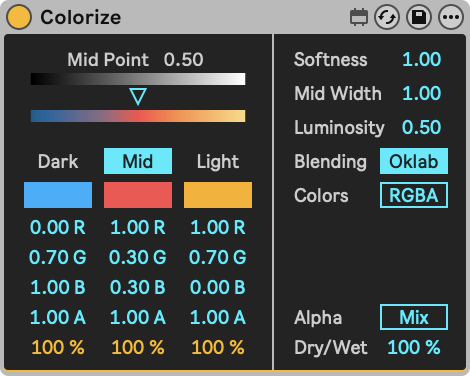
Devices that deal with color blending (such as Properties and Colorize) usually include a toggle to switch between the RGB and Oklab blending methods. Regular RGB mixes colors with linear interpolation over the RGB channels. Oklab mixes the colors according to the Oklab color space, which generally produces more uniform looking transitions in terms of perceived brightness and color.
