Effects
- Blur
- Color Mixer
- Color Swap
- Color Utility
- Colorize
- Crop Map
- Displacement
- Feedback
- Gradient
- ISF Shader
- Keyer
- Lava
- Mirror
- Pixelate
- Properties
- Status
- Transform
- Video Monitor
- Video Recorder
- Voronoi
- Wavvy
Blur
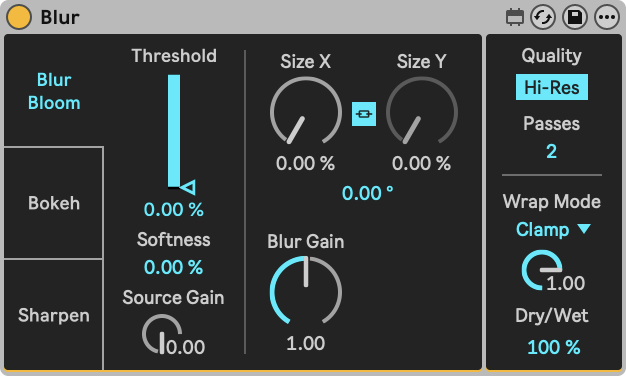
A blur effect with three modes: "Blur / Bloom", "Bokeh" and "Sharpen".
- Blur / Bloom: Simple blur when "Source Gain" is set to 0. Increasing "Source Gain" and "Threshold" creates a bloom effect, causing a soft glow around bright areas in an image, emulating light diffusion.
- Bokeh: Replicates the aesthetic of out-of-focus regions in photography, resulting in soft circular or hexagonal shapes.
- Sharpen: Increases edge contrasts for more defined images.
- Blur Bloom
- Bokeh
- Sharpen
- Common Parameters
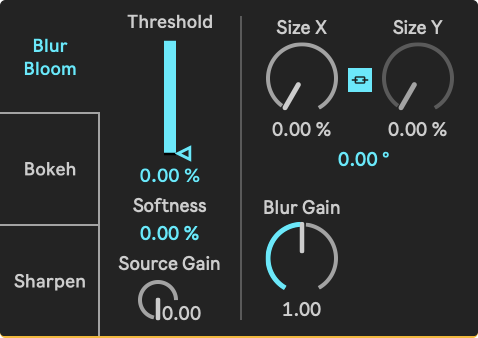
Parameters
- Thresshold: Pixels with a brightness above the threshold will be processed as if they were light sources, resulting in specular highlights/bokeh balls.
- Softness: Softens the threshold, resulting in a more gradual transition around the threshold value.
- Source Gain: Sets the gain of the original, unprocessed, video.
- Size X: Sets the blur size for the X axis.
- Size Y: Sets the blur size for the Y axis.
- Link Size: When enabled, the blur size for the X-axis also influences the blur size for the Y-axis. The Size Y parameter will be disabled.
- Blur Angle: Sets the angle of the blur directionality.
- Blur Gain: Gain Sets the amount of blur to be applied.
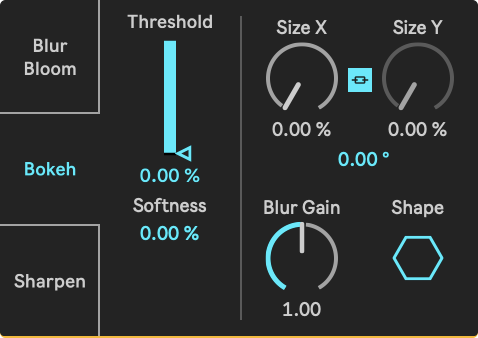
Parameters
- Thresshold: Pixels with a brightness above the threshold will be processed as if they were light sources, resulting in specular highlights/bokeh balls.
- Softness: Softens the threshold, resulting in a more gradual transition around the threshold value.
- Size X: Sets the blur size for the X axis.
- Size Y: Sets the blur size for the Y axis.
- Link Size: When enabled, the blur size for the X-axis also influences the blur size for the Y-axis. The Size Y parameter will be disabled.
- Blur Angle: Sets the angle of the blur directionality.
- Blur Gain: Gain Sets the amount of blur to be applied.
- Shape: Sets the diaphragm shape for the Bokeh effect.
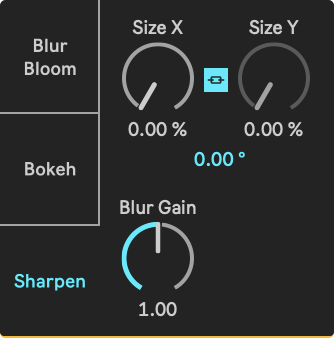
Parameters
- Size X: Sets the blur size for the X axis.
- Size Y: Sets the blur size for the Y axis.
- Link Size: When enabled, the blur size for the X-axis also influences the blur size for the Y-axis. The Size Y parameter will be disabled.
- Blur Angle: Sets the angle of the blur directionality.
- Blur Gain: Gain Sets the amount of blur to be applied.
Parameters
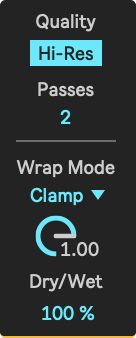
- Quality: When enabled, Blur uses the incoming resolution for processing. When disabled, a lower resolution texture is processed, resulting in optimized performance but visible artefacts with low blur widths.
- Passes: More passes result in a smoother effect but also require more computer processing power.
- Wrap Mode:
- Wrap: Pixels wrap around the window borders, creating a tiled effect.
- Mirror: Pixels are mirrored beyond the window borders, creating a reflection effect.
- Clamp: Pixels are stretched beyond the window borders.
- Wrap Gain: Sets the gain of pixels beyond window borders, those affected by the Wrap Mode setting.
- Dry/Wet: Sets the balance between the unprocessed and processed video.
Color Mixer
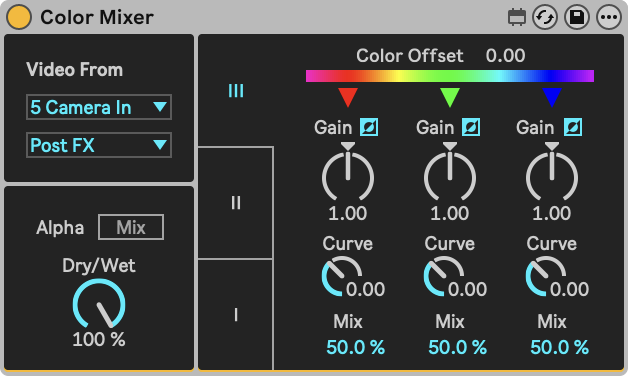
Manipulates the color and brightness components of an image. Selecting an optional sidechain source will allow you to blend the color and brightness of another track into the texture of the Color Mixer's host track.
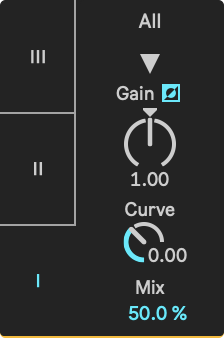
- III: Control 3 components in RGB color space.
- II: Control 2 components, brightness and color, in YUV color space.
- I: Control 1 component in Oklab color space.
- Common Parameters
- III mode
- II mode
- I mode

Parameters
- Sidechain Menu: Sets which track to blend with this track.
- Sidechain Tapping Point: Selects the point at which the sidechain signal is tapped.
- Dry/Wet: Sets the balance between the unprocessed and processed video.
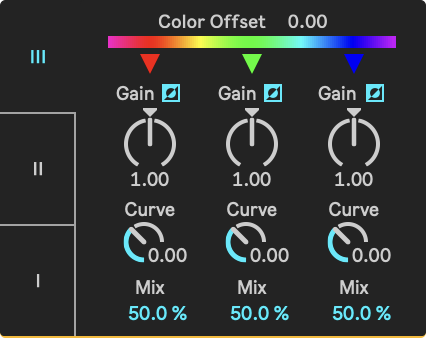
Parameters
- Color Offset: Adjusts the hues of the color components used for RGB mixing.
- Gain: Adjusts the output intensity of the color component.
- Gain Invert: Inverts the color component, turning positive Gain values into negative ones.
- Curve: Adjusts the output intensity curve of the color component.
- Mix: Sets the amount of sidechain influence on the color component's mix.
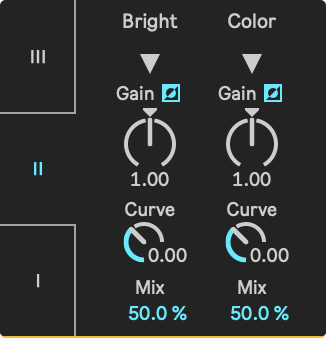
Parameters
- Bright Gain: Adjusts the output brightness.
- Bright Invert: Inverts the brightness component, turning positive Gain values into negative ones.
- Bright Curve: Adjusts the output brightness curve.
- Color Gain: Adjusts the output color intensity.
- Color Invert: Inverts the color component, turning positive Gain values into negative ones.
- Color Curve: Adjusts the output color intensity curve.
- Mix: Sets the amount of sidechain influence on the Bright component's mix.
Parameters
- Gain: Adjusts the output brightness.
- Gain Invert: Inverts all components, turning positive Gain values into negative ones.
- Curve: Adjusts the output brightness curve.
- Mix: Sets the mix of the sidechain input.
Color Swap
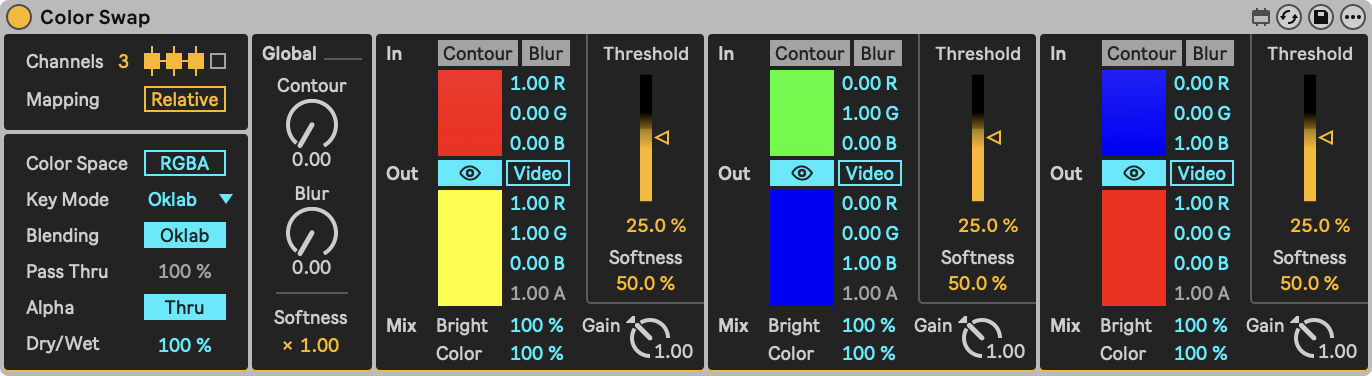
Color Swap lets you replace colors with other colors or video sources. Transform any color into video sources, create smooth color remapping across entire images, or perform precise selective color replacement. Suitable for traditional green screen work, subtle color correction, or wild artistic transformations.
- Settings
- Global
- Swap Elements
Parameters
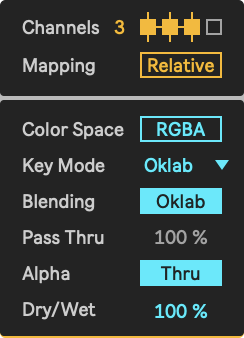
- Channels: Sets the number of colors that can be keyed simultaneously.
- Mapping: Choose how colors get replaced.
- Absolute: Replace colors within thresholds. Overlapping replacements are added together. Areas outside thresholds pass through or become transparent (see Pass Thru).
- Relative: Thresholds are relative - input is divided between colors, totaling 100%. A purple area might become 60% red + 40% blue + 0% green. Everything gets remapped.
- Color Space: Sets the color format for all In and Out colors. Options are RGB (Red Green Blue) and HSL (Hue Saturation Lightness). Both color formats share the same alpha value.
- Key Mode: Choose the color matching algorithm.
- Chroma: Focuses on hue and saturation while reducing lighting sensitivity.
- Oklab: Perceptually accurate color matching.
- YUV: Calculates color differences in YUV color space.
- Blending Method: Sets the blending method. RGB mixes colors with linear interpolation over the RGB channels. Oklab mixes the colors according to the Oklab color space, which generally produces more uniform looking transitions in terms of perceived brightness and color.
- Pass Thru: In Relative mode, everything gets mapped, so Pass Thru has no effect. In Absolute mode, this controls what happens to areas not being keyed:
- 0%: Unmapped areas become transparent.
- 50%: Unmapped areas become semi-transparent.
- 100%: Unmapped areas show the original (dry) image.
- Alpha: Sets the alpha processing mode.
- Mix: Mix incoming and outgoing alpha per mapping, using the "Bright" parameter
- Thru: Incoming alpha passes through unchanged.
- Dry/Wet: Sets the balance between the unprocessed and processed video.
Parameters
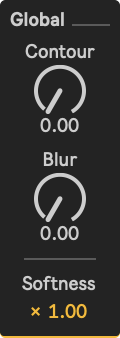
- Contour: Rounds the edges of mapped areas, creating rounder shapes. This is done by blurring the image before color detection. This rounding effect is visible at lower Softness levels. At higher Softness levels this effect feels more similar to Blur, which blurs mapped areas after color detection. Only applies to mappings where 'Contour' is activated.
- Blur: Blurs the mapping result after color detection, creating softer boundaries. This differs from Softness (which applies to color transitions) and Contour (input blur). The replacement content is not affected. Only applies to mappings where 'Blur' is activated.
- Softness: Global multiplier of the Threshold Softness values. Softness controls how sharp the Threshold boundary is. Higher values create gradual transitions between detected and undetected pixels.
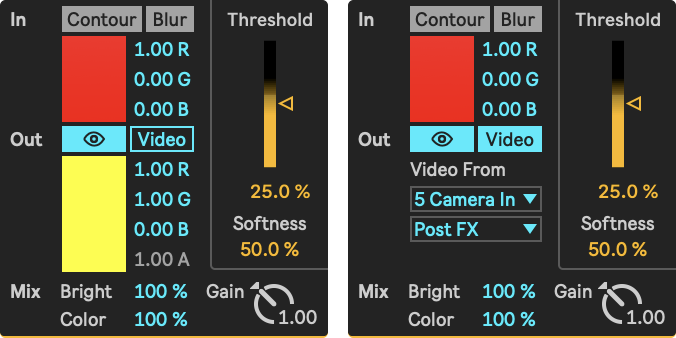
Parameters
- Threshold: Sets the color detection range for this channel. Higher values detect more similar colors.
- Softness: Controls how sharp the Threshold boundary is. Higher values create gradual transitions between detected and undetected pixels.
- Input Color:
- Contour: Applies the global Contour Amount to this mapping, rounding contours of this area. Especially at lower Softness levels, the distinction between Contour and Blur becomes apparent.
- Blur: Apply the global Blur Amount to this mapping, softening edges of this area. Especially at lower Softness levels, the distinction between Contour and Blur becomes apparent.
- Color Box: Click the color box to pop up a color chooser to visually select an Input color.
- In RGB mode:
- Red: Sets the Red amount for the Input color.
- Green: Sets the Green amount for the Input color.
- Blue: Sets the Blue amount for the Input color.
- In HSL mode:
- Hue: Sets the Hue amount for the Input color.
- Saturation: Sets the Saturation amount for the Input color.
- Lightness: Sets the Lightness amount for the Input color.
- Output:
- Mute: Enable/Disable this color replacement.
- Video: Toggle between Out Color and Video (Sidechain) replacement.
- When replacing with a color:
- Color Box: Click the color box to pop up a color chooser to visually select an Output color.
- In RGB mode:
- Red: Sets the Red amount for the Output color.
- Green: Sets the Green amount for the Output color.
- Blue: Sets the Blue amount for the Output color.
- In HSL mode:
- Hue: Sets the Hue amount for the Output color.
- Saturation: Sets the Saturation amount for the Output color.
- Lightness: Sets the Lightness amount for the Output color.
- Alpha: Sets the Alpha amount for the Output color.
- When replacing with Video (Sidechain):
- Sidechain Source: Select a video source to replace the input color with.
- Sidechain Tapping Point: Selects the point at which the sidechain signal is tapped.
- Mix:
- Brightness: Controls brightness mixing between original and replacement, applied before Gain: essentially a Dry/Wet for brightness in this color channel, where 0% is the original brightness, and 100% is the replacement brightness. If Alpha Mix is enabled, this parameter mixes Alpha as well
- Color: Controls color mixing between original and replacement, applied before Gain: essentially a Dry/Wet for output color in this color channel, where 0% is the original color, and 100% is the replacement color.
- Gain: Amplifies the output of this color channel.
Color Utility
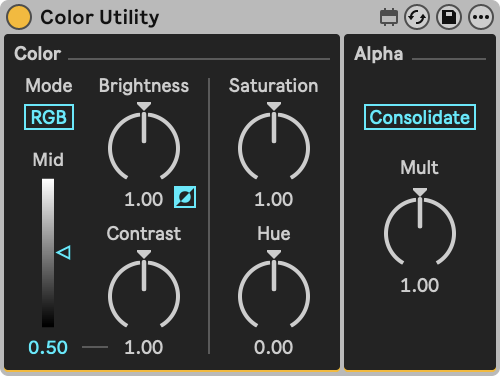
A simple device that provides control over video brightness, color, and alpha settings. Switch between RGB and YUV modes, adjust brightness, contrast, hue, and saturation, and manage alpha values with consolidation and multiplication options.
- Color
- Alpha
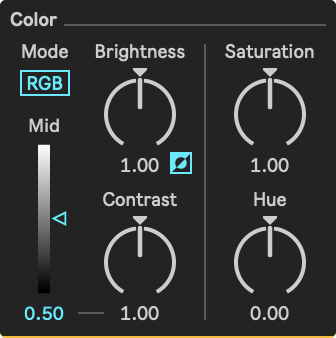
Parameters
- Mode: Sets the color space in which brightness and contrast are applied. Switches between RGB and YUV.
- Mid: Sets the luminance/brightness reference point for applying contrast.
- Brightness: Changes the Brightness of the incoming video.
- Brightess Invert: Inverts the brightness in respect to the chosen Mode.
- Contrast: Changes the Contrast of the incoming video, based on the Mid Point.
- Hue: Shifts the Hue of the incoming video.
- Saturation: Changes the Saturation of the incoming video.

Parameters
- Consolidate: When enabled, all pixel colors are multiplied with the pixel alpha values, and alpha is set to 1. This results in the image being completely opaque.
- Mult: Multiplies the alpha values of the incoming video.
Colorize
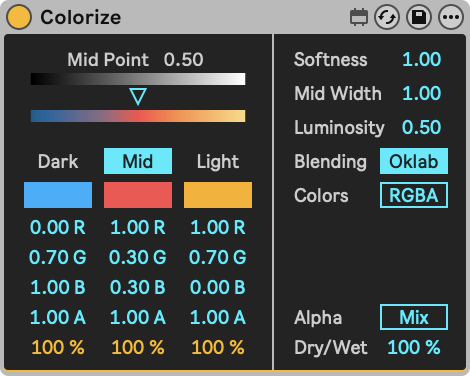
This device allows advanced color operations using Dark, Mid, and Light color controls to create dynamic color gradients based on the intensity of the input.
Parameters
- Mid Point: This sets the position of the Mid color in the gradient. When the Mid color is disabled, the Mid Point sets the point at which the Dark and Light colors mix equally.
- Mid: Enable or disable usage of the mid color in the colorization gradient.
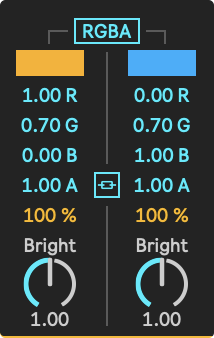
- Color Format: Sets the color format for the Dark, Mid and Light colors. Options are RGBA (Red Green Blue) and HSLA (Hue Saturation Lightness). Both color formats share the same alpha values.
- Per color:
- Color Box: Click the color box to pop up a Color Picker to visually select a color.
- In RGB mode:
- Red: Sets the Red amount for the respective color.
- Green: Sets the Green amount for the respective color.
- Blue: Sets the Blue amount for the respective color.
- In HSL mode:
- Hue: Sets the Hue amount for the respective color.
- Saturation: Sets the Saturation amount for the respective color.
- Lightnes: Sets the Lightness amount for the respective color.
- Alpha: Sets the transparency for the respective color when Alpha Thru is disabled.
- Color Dry/Wet: Sets the Dry/Wet amount for the respective color.
- Softness: The transition smoothness between Dark, Mid and Light colors.
- Mid Width: Sets the width of the Mid color band.
- Luminosity Retainment: Controls how much of the original luminosity is retained (0 = ignore original luminosity, 1 = full effect). In Oklab mode, the original luminosity is fully preserved. In RGB mode, the original luminosity is multiplied into the chosen colors, darkening them.
- Blending: Sets the blending method. RGB mixes colors with linear interpolation over the RGB channels. Oklab mixes the colors according to the Oklab color space, which generally produces more uniform looking transitions in terms of perceived brightness and color.
- Alpha Thru: While enabled, alpha values from the incoming texture are retained. While disabled, alpha values are overwritten with the Dark, Mid and Light Alpha values.
- Dry/Wet: Sets the balance between the unprocessed and processed video.
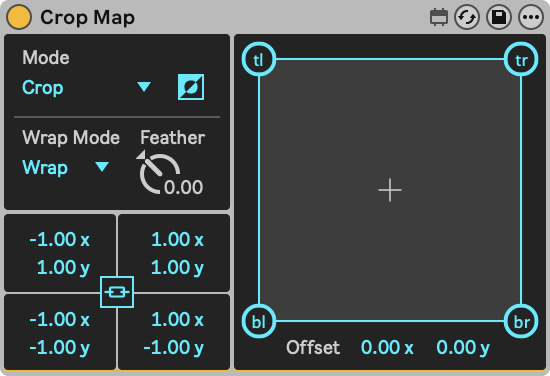
Crop Map
This device is used for both cropping video and projection mapping. It offers various modes for scaling and cropping, along with options for inversion, wrapping, feathering, and precise corner adjustments.
Parameters
- Mode:
- Crop applies no scaling to the incoming image and may be used to discard parts of the image, depending on Invert and Feather settings. Depending on Wrap Mode it can also be used to repeat/clamp a part of the incoming image.
- Bilinear applies linear scaling to the incoming image to fit inside the bounds.
- Perspective applies perspective accurate scaling to the incoming image to fit inside the bounds.
- Invert:
- In Crop mode, when enabled, the area inside of the crop shape is darkened. When disabled, pixels outside of the crop shape are darkened.
- In Bilinear mode, when enabled, the area inside the bounds is stretched to fill the screen by applying inverse linear scaling.
- In Perspective mode, when enabled, the area inside the bounds is stretched to fill the screen by applying inverse perspective accurate scaling.
- Wrap Mode: Choose from three Wrap Modes: Wrap, Mirror, Clamp.
- Clamp stretches the incoming image using the colors of its edges, resulting in a stretched edge pattern.
- Wrap repeats the incoming image.
- Mirror repeats the incoming image using mirroring.
- Feather: Sets the amount of feathering. Negative values fade inwards. Positive values fade outwards. Content for outward fading is determined by the Wrap Mode.
- Corner selectors: Use the individual X/Y handles of all 4 corners for precise placement.
- Lin:k With Link enabled, the vertical width is disabled. The horizontal width is applied to the vertical width as well.
- Mapping Window: Use the handles to control the outer corners and crop/map parts of the incoming signal. It is also possible to grab the lines inbetween the handles to move the two connected corners at once. The handles will become yellow when Invert is enabled.
- Offset: Offsets the set shape on the X and Y axes.
Displacement
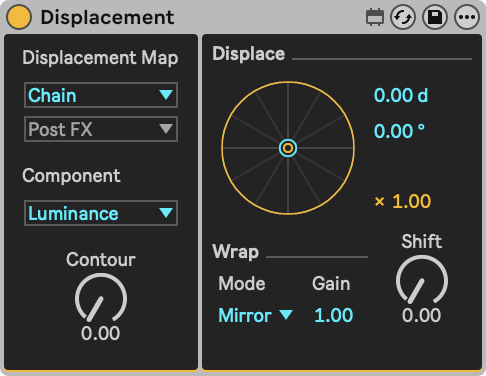
A displacement effect with displacement map input. By default it displaces its input based on its own overall luminance or a color channel. But it can also use the output of another track, otherwise known as a sidechain, as a displacement source. This makes Displacement a very versatile effect.
- Displacement Map
- Displace
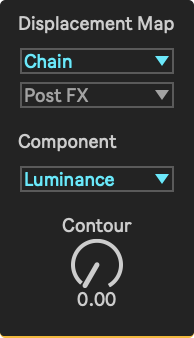
Parameters
- Sidechain Source: Sets which track to use as a source for calculating the amount of displacement per pixel.
- Sidechain Tapping Point: Selects the point at which the signal of the sidechain signal is tapped.
- Component: Sets which aspect of the sidechain to use for displacement.
- Contour: Sets the amount of blur to apply to the sidechain.

Parameters
- Displacement Distance: Specifies the amount of displacement to be applied to the video, based on the incoming signal's component factor.
- Displacement Angle: Specifies the angle of displacement to be applied to the video, based on the incoming signal's component factor.
- Direction Multiply: Multiplies the amount of displacement to be applied to the video.
- Shift: Acts as a counterweight for the displacement amount, moving pixels into the opposite direction of that set in the Displace coordinates.
- Wrap Mode: Sets the Wrap Mode:
- Wrap: Pixels wrap around the window borders, creating a tiled effect.
- Mirror: Pixels are mirrored beyond the window borders, creating a reflection effect.
- Clamp: Pixels are stretched beyond the window borders.
- Wrap Gain: Sets the gain of pixels beyond window borders, those affected by the Wrap Mode setting.
Feedback
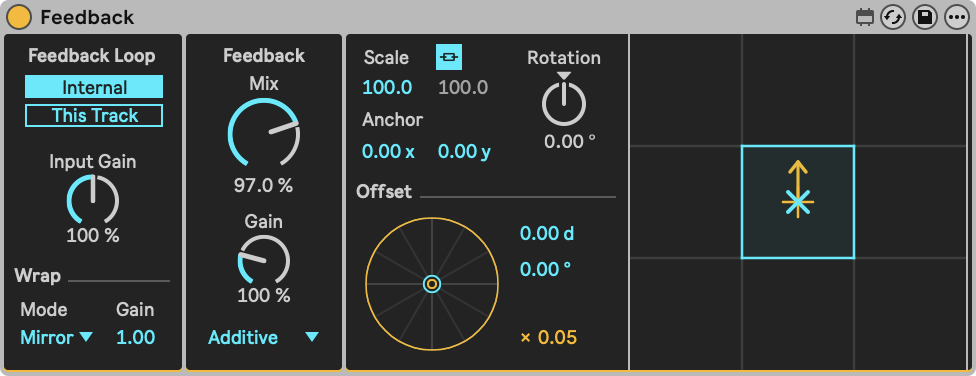
Copies the previous frame onto the current frame, resulting in an echo effect. While copying, the frame can be scaled horizontally and vertically. This results in the echos moving inward or outward.
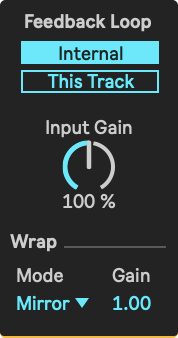
- Feedback Loop
- Feedback Mix
- Feedback Transform
Parameters
- Video From: Sets the feedback video to feed into the feedback loop. "Internal" feeds the output of this device back into its input. "Sidechain" feeds the output of the selected sidechain into its input.
- Input Gain: This adjusts the brightness of the incoming video before entering the feedback loop. Note: when this value is 0, no video will enter the effect at all, resulting in no visible output.
- Wrap Mode: Sets the Wrap Mode:
- Wrap: Pixels wrap around the window borders, creating a tiled effect.
- Mirror: Pixels are mirrored beyond the window borders, creating a reflection effect.
- Clamp: Pixels are stretched beyond the window borders.
- Wrap Gain: Sets the gain of pixels beyond window borders, those affected by the Wrap Mode setting.
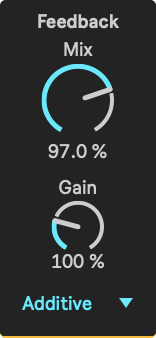
Parameters
- Feedback Mix: Sets the ratio of feedback video vs incoming video:
- Lower values emphasise the incoming video over the feedback video.
- Higher values emphasise the feedback video over the incoming video.
- Feedback Gain: This adjusts the brightness of the incoming video after entering the feedback loop. Note: this may exponentially increase or decrease the image brightness over time.
- Blend Mode: Sets the blend mode that defines how the feedbacked signal blends with the incoming signal.
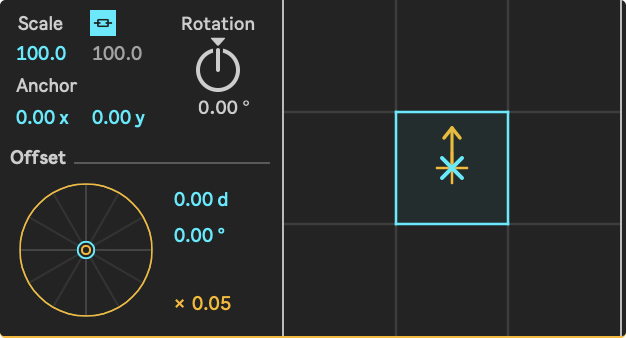
Graphical User Interface
- Hovering over the "+" shape will allow for selecting and adjusting the Position X/Y.
- Hovering over the "X" shape will allow for selecting and adjusting the Anchor Point X/Y.
- Hovering over the arrowhead will allow changing the rotation.
- Hovering over an area within the blue frame will allow for selecting and adjusting the Scale X/Y.
Parameters
- Scale X/Y: Scales the video. The origin from which the video is scaled is defined by the anchor point. When the anchor point is in the center, the video will scale on all sides. When the anchor point is on the top-left, the video will scale towards the right.
- Anchor X/Y: All geometric manipulations to the video occur relative to the anchor point. The default value (0, 0) represents the center of the video. For example, applying a rotation transform to a layer with the default anchor point causes the layer to rotate around its center. Changing the anchor point to a different location would cause the video to rotate around that new point.
- Rotation: Rotates the video around the anchor point.
- Offset Distance: Distance by which to offset the video's position.
- Offset Angle: Angle at which to offset the video's position.
- Offset Multiply: Multiplies the offset amount.
Gradient
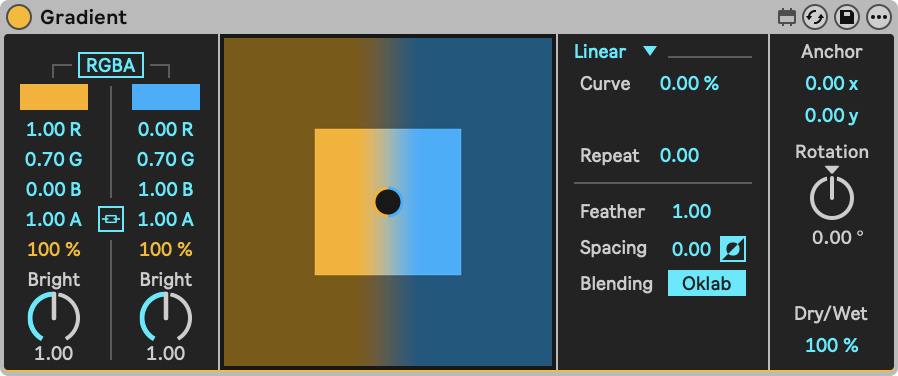
Creates monochromatic and duochromatic gradients with three distinct types: Linear, Radial, and Conical. Use Feather to go from a smooth gradient to two solid colors, while Spacing sets the distance between the two color planes. Linear gradients create straight or curved transitions, Radial gradients produce circular patterns emanating from a center point, and Conical gradients generate angular transitions that rotate around an anchor point.
- Gradient Colors
- Graphical User Interface
- Gradient Settings
- Gradient Anchor
Parameters
- Color Format: Sets the color format for both colors. Options are RGB (Red Green Blue) and HSL (Hue Saturation Lightness). Both color formats share the same alpha value.
- Per color:
- Color Box: Click the color box to pop up a color chooser to visually select a color.
- In RGB mode:
- Red: Sets the Red amount for the respective color.
- Green: Sets the Green amount for the respective color.
- Blue: Sets the Blue amount for the respective color.
- In HSL mode:
- Hue: Sets the Hue amount for the respective color.
- Saturation: Sets the Saturation amount for the respective color.
- Lightness: Sets the Lightness amount for the respective color.
- Alpha: Sets the transparency for the respective color
- Color Dry/Wet: Sets the Dry/Wet amount for the respective color.
- Bright: Sets the Brightness for the respective color. The value is multiplied with the RGB channels, fading to black as the Brightness value gets closer to 0.
- Link Color:s When linked, Color 2 will be disabled, and Color 1 will be used to draw a monochromatic gradient.

The circle represents the Anchor point from which the angle is determined. The brighter inner square represents the visible output. The larger and darker outer square can be still be used to place the Anchor point.

Parameters
- Gradient Type: Sets the type of gradient: Linear, Radial, or Conical.
- Linear Curve: Sets the curvature of the linear gradient.
- Conical Angle: Sets the angle of the conical gradient transition. The angle rotates the transition area, which is mirrored around the gradient anchor. At 0°, the transition center forms a straight line.
- Conical Core Radius: Sets the radius of the central area where gradient colors are inverted.
- Radial Radius: Sets the radius of the radial gradient. This determines the size of the circular gradient area.
- Radial Stretch: Sets the stretch of the radial gradient. At 0, the gradient is perfectly circular, while higher values stretch it into an elliptical shape. At 1, the gradient becomes fully linear.
- Repeat: Sets the gradient to repeat in the area of Color 1, creating alternating patterns that follow the main gradient's shape.
- Feather: Controls the feathering of the color fields, defining smoothness and blending of color transitions.
- Spacing: Regulates the spacing between the two color fields. The resulting space is transparent by default but becomes opaque when 'Invert' is activated.
- Invert Spacing: Inverts the transparency/opaqueness of the spacing.
- Blending: Sets the blending method.
- RGB mixes colors with linear interpolation over the RGB channels.
- Oklab mixes the colors according to the Oklab color space, which generally produces more uniform looking transitions in terms of perceived brightness and color.
Parameters
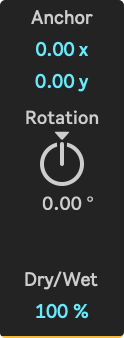
- Anchor X/Y: Sets the X/Y coordinates of the anchor that determines the center of the gradient and around which rotation occurs.
- Rotation: This rotates the gradient around the anchor point.
- Dry/Wet: Sets the balance between the unprocessed and processed video.
ISF Shader
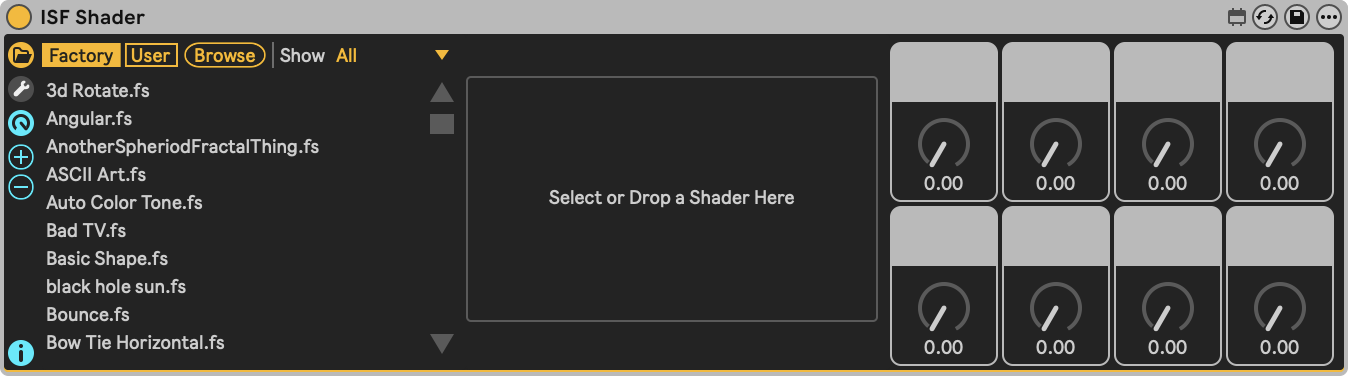
While technically an Effect, the ISF Shader is a more complex device that has its own manual page.
Keyer
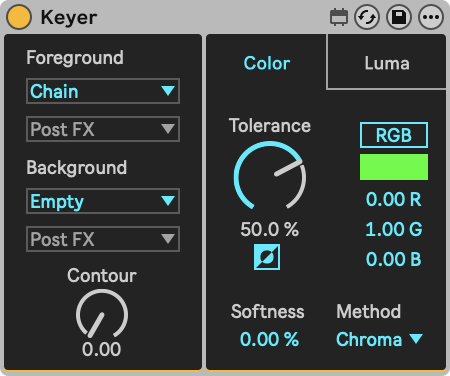
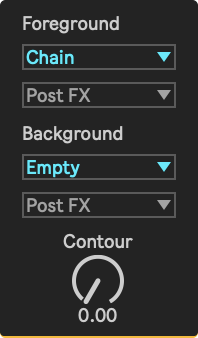
A very versatile device with a luminance and chroma keyer. It mimics the classic analog keying setup, allowing to set both the foreground and the background images from sidechain tracks.
- Inputs
- Color mode
- Luma mode
Parameters
- Foreground Video From: The track that will be visible on pixels above the threshold / tolerance level.
- Foreground Tapping Point: Selects the point at which the Foreground signal is tapped.
- Background Video From: The track that will be visible on pixels below the threshold / tolerance level.
- Background Tapping Point: Selects the point at which the Background signal is tapped.
- Sidechain Contour: Sets the amount of blur applied to the key mask.
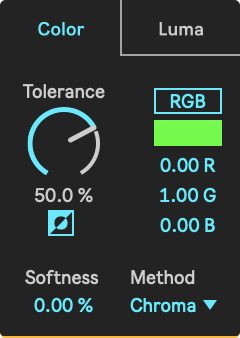
Parameters
- Color Tolerance: Sets the threshold for the color key. Pixels with a color difference above the threshold will be filled with the chosen foreground source, the pixels below with the chosen background source.
- Color Tolerance Invert:
- When disabled, incoming pixels with colors within the tolerance distance from the key color are replaced with the background source, while those outside the tolerance distance are replaced with the foreground source.
- When enabled, this is inverted: pixels within the tolerance distance are replaced with the foreground source, while those outside are replaced with the background source.,
- Color Format: Sets the color format for the key color. Options are RGB (Red Green Blue) and HSL (Hue Saturation Lightness).
- Per color:
- Color Box: Click the color box to pop up a color chooser to visually select a color.
- In RGB mode:
- Red: Sets the Red amount for the key color.
- Green: Sets the Green amount for the key color.
- Blue: Sets the Blue amount for the key color.
- In HSL mode:
- Hue: Sets the Hue amount for the key color.
- Saturation: Sets the Saturation amount for the key color.
- Lightness: Sets the Lightness amount for the key color.
- Per color:
- Softness: Softens the threshold, resulting in a more gradual slope towards the threshold.
- Method: Sets the method for how the color difference is calculated.
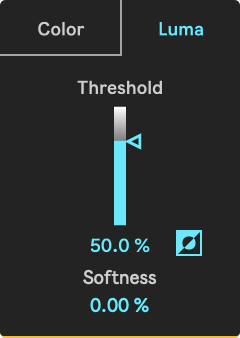
Parameters
- Luma Threshold: Sets the threshold for the luminance key. Pixels with a luminance above the threshold will be filled with the chosen foreground source, the pixels below with the chosen background source.
- Luma Invert:
- When disabled, incoming pixels with luminosities below the threshold are replaced with the background source, while those above are replaced with the foreground source.
- When enabled, this is inverted: luminosities below the threshold are replaced with the foreground source, while those above are replaced with the background source.
- Luma Softness: Softens the threshold, resulting in a more gradual slope towards the threshold.
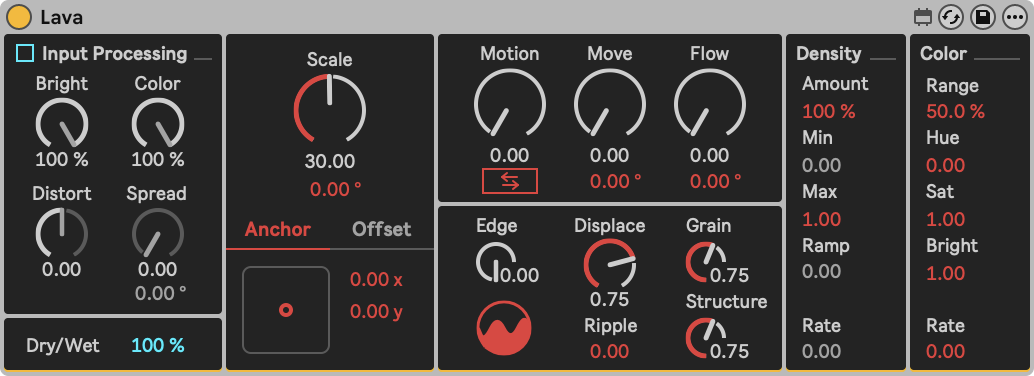
Lava
Akin to Voronoi, Lava is a hybrid between a generator and an effect. Its pattern creation and image manipulation algorithms draw inspiration from Brownian Noise, emulating the variability found in many natural systems, giving an organic quality to the device's output.
- Input Processing
- Scale
- Shape
- Density
- Color
Parameters
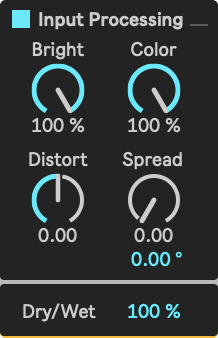
- Input Processing: Enable/disable input processing. Enabling input processing is more taxing for the GPU, and may result in a slight drop in frames per second.
- Bright: Determines the influence of the incoming image brightness on the Lava brightness.
- Color: Determines the influence of the incoming image color on the Lava color.
- Distort: Determines the influence that the input image has on the amount of distortion in the output image.
- Spread: Determines the amount of displacement of the input image.
- Spread Angle: Determines the angle of the input image effects.
- Dry/Wet: Determines the dry/wet balance.
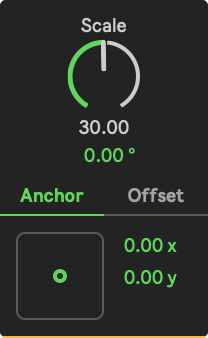
Parameters
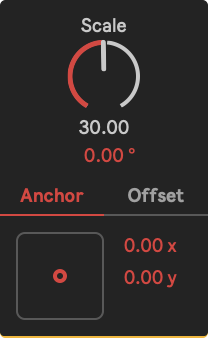
- Scale: This adjusts the scale of the Lava pattern, zooming in/out around the anchor point defined by 'Anchor X' and Anchor Y'.
- Angle: This rotates the Lava pattern around the anchor point defined by 'Anchor X' and Anchor Y'.
- Anchor/Offset: Determines if the Anchor tab or the Offset tab is displayed.
- Anchor X: This sets the X coordinate of the anchor around which scaling and rotation occurs.
- Anchor Y: This sets the Y coordinate of the anchor around which scaling and rotation occurs.
- Offset X: This shifts the Lava pattern left/right. The amount of shifting is multiplied with the amount set in 'Offset Multiplier'.
- Offset Y: This shifts the Lava pattern up/down. The amount of shifting is multiplied with the amount set in 'Offset Multiplier'.
- Offset Mult: This multiplies the impact of 'Offset X' and 'Offset Y'.
Parameters
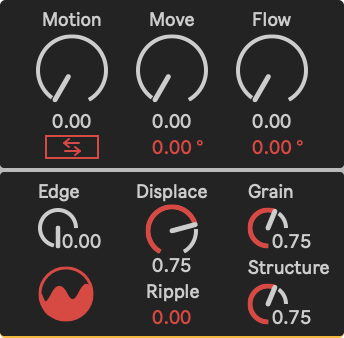
- Motion: This defines the speed at which the pattern morphs.
- Motion Rev: Reverses the motion of the Lava pattern.
- Move: This defines the speed at which the pattern moves in the direction defined by 'Move Angle'.
- Move Angle: This defines the angle at which the pattern moves at the speed defined by 'Move'.
- Flow: This defines the speed at which layers of the pattern move relative to each other, in the direction defined by 'Flow Angle'.
- Flow Angle: This defines the angle at which the pattern flows at the speed defined by 'Flow'.
- Edge: This determines the amount of interpolation in the pattern, with higher values giving more angular results.
- Level of Detail: Switches between a less detailed, lighter processing and detailed, complex processing.
- Displace: This determines the amount of pattern displacement.
- Ripple: This determines the amount of ripple effect applied to the pattern.
- Grain: This determines the significance of smaller details within the overall pattern.
- Structure: This determines the depth and clarity of the pattern structure.
Parameters
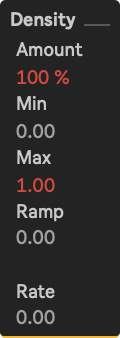
- Amount: This determines how much of the pattern is visible.
- Minimum: This determines the minimum visibility of the pattern.
- Maximum: This determines the maximum visibility of the pattern.
- Ramp: This determines the relative transition time between minimum and maximum visibility values.
- Rat:e This controls the rate at which the visibility values alternate between the minimum and maximum values.
Parameters
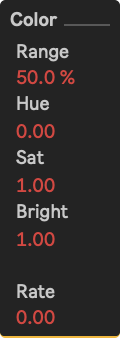
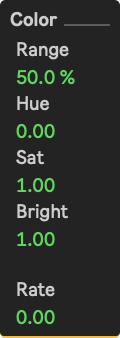
- Range: This determines the variety of colors.
- Hue: This sets the hue offset of colors.
- Sat: This sets the color saturation.
- Bright: This sets the color brightness.
- Rate: This controls the rate at which colors alternate.
Mirror
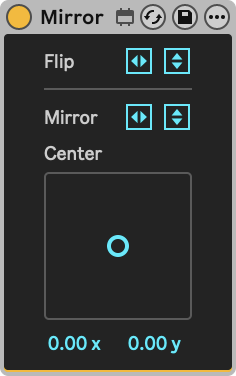
A basic device used to flip and/or mirror the video. The X/Y pad sets the horizontal and vertical center point from which to mirror the video.
Parameters
- Flip: Flips the entire video horizontally and/or vertically.
- Mirro:r Mirrors a portion of the video defined by Center horizontally and/or vertically.
- Cente: Sets the horizontal and vertical center point from which to mirror the video.
Pixelate
A simple device used to downsample the video resolution. Interpolate gradually to smooth out the pixelation effect.
Parameters
- Horizontal: Sets the pixelation amount in the horizontal direction.
- Vertical: Sets the pixelation amount in the vertical direction.
- Link: Links the vertical value to the horizontal value.
- Interpolate: When enabled, pixels are linearly interpolated and thus have a smooth color transition between them.
Properties
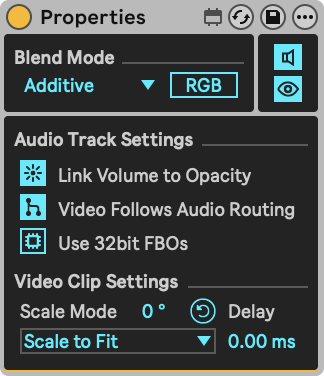
The Properties device contains a collection of settings for tracks or rack chains which are not directly available in the interface of Ableton Live. In this way, Properties behaves differently than other devices: only one Properties device can exist on a track or in a chain. When there are two Properties devices on the same track, only the left of the two will be used. The other device will display a warning.
- Blend Mode
- Muting
- Chain settings

Parameters
- Blend Mode: Blend mode is a setting that defines the way the outputs of tracks are mixed (more detail here). This setting affects the entire track or chain on which the Properties device is added.
- Blending: Sets the blending method. RGB mixes colors with linear interpolation over the RGB channels. Oklab mixes the colors according to the Oklab color space, which generally produces more uniform looking transitions in terms of perceived brightness and color.

Parameters
- Mute Audio: Stops audio from passing through the device.
- Mute Video: Mutes all video processing on the chain or track.
Parameters
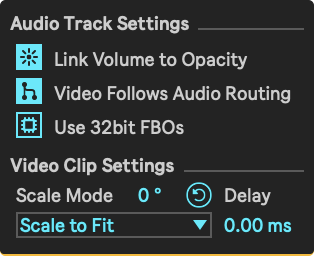
- Link Volume to Opacity: Enabled by default, but can be switched off when it is not desired to have the volume fader of a track or chain control the opacity of the video output as well.
- Video Follows Audio Routing: Enabled by default, but can be switched off when it is not desired to have the video signal follow the audio routings in Live. While disabled, the video output of the track will always be routed to the Master track.
- Use 32bit FBOs: By default Videosync uses 16bit FBOs (Frame Buffer Objects). This is fine for most use cases, though when exceptional color depth is required on a track or chain, you have the option to switch to 32bit FBOs. This is great for getting smoother gradients between colors. However, this setting affects ALL devices that live in the signal chain (including racks), possibly increasing the GPU workload by a substantial amount.
- Scaling: (Audio Tracks only) Defines the scaling mode for this track. Scale to Fit scales the video to fit the window while keeping the original aspect ratio. Scale to Fill scales the video to completely cover the window while respecting the original aspect ratio. Stretch to Fill stretches the video to completely fill the window, not respecting original aspect ratio. Original does not alter the video in any way.
- Rotate: (Audio Tracks only) Rotates the video clips in steps of 90 degrees.
- Video Delay: (Audio Tracks only) Sets a delay on the playing video to correct possible latency when using video hardware. This value acts as the 'Track Delay' setting in Live, except the 'Video Delay' is only applied to playing video files, while the 'Track Delay' only delays audio.
- Send Type: (Return Tracks only) Sets the 'Pre/Post Toggle' value of the sends like the buttons above the master track's fader. This button must be set exactly like Live's native buttons to get the expected behaviour.
Scope
The Properties device has different settings available depending on the type of track/chain it is added on. Also, some settings are not applicable for chains, and are disabled when the Properties device is added onto a chain.
Since multiple chains can exist in a track, chains can have different settings than their parent track. Chains within a track can be blended with different settings than those used to blend their parent track with other tracks. Therefore, a Properties device's scope does not leave the chain. You can put a Properties device on each chain in an Audio Effect Rack and also put a Properties device on their parent track without conflicts.
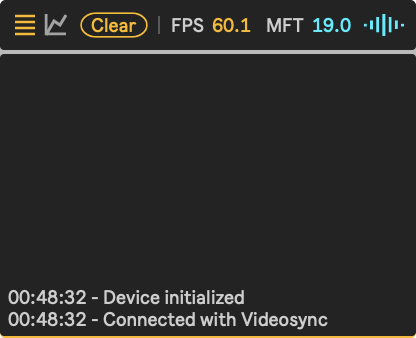
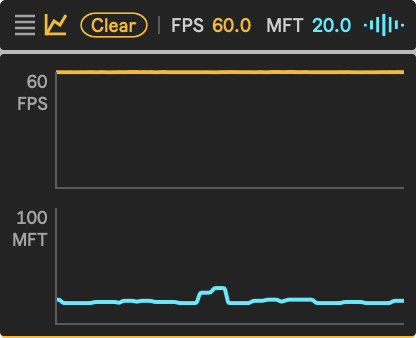
Status
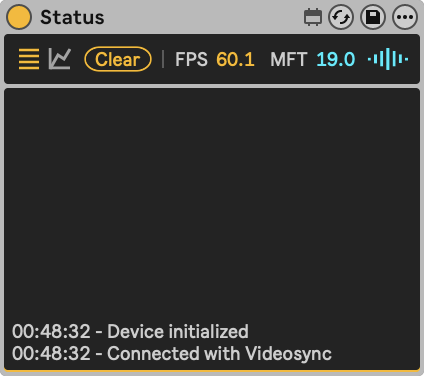
The Status device does not have any interactive controls, since its purpose is to display the connection state, frames per second and maximum frame time, as well as a history graph to monitor the performance over a longer period of time. This is especially useful when running Videosync in Networked Mode, if you want to keep an eye on Videosync's performance on the machine that runs Live.
- Log mode
- Graph mode
Transform
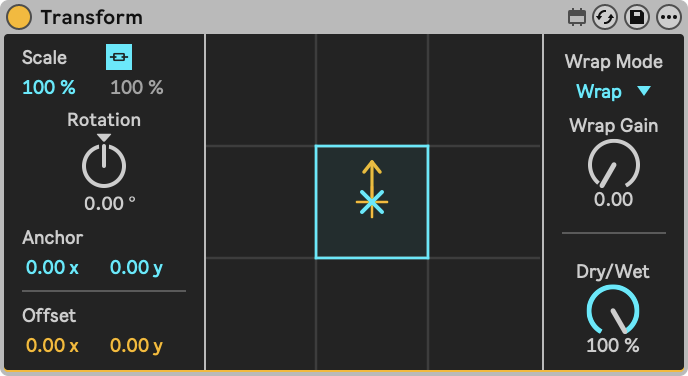
Device for positioning, scaling and rotating video. When scaled down, Wrap can be used to fill the area around the scaled down video.
- Transform
- Wrap Mode
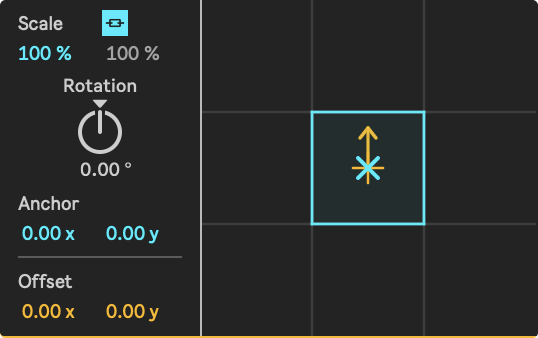
Graphical User Interface
- Hovering over the "+" shape will allow for selecting and adjusting the Position X/Y.
- Hovering over the "X" shape will allow for selecting and adjusting the Anchor Point X/Y.
- Hovering over the arrowhead will allow changing the rotation.
- Hovering over an area within the blue frame will allow for selecting and adjusting the Scale X/Y.
Parameters
- Scale: Scales the video. The origin from which the video is scaled is defined by the anchor point. When the anchor point is in the center, the video will scale on all sides. When the anchor point is on the top-left, the video will scale towards the right.
- Link Scale: When enabled, the scale for the X-axis also influences the scale for the Y-axis, and the Y-axis scale parameter will be disabled.
- Rotation: Rotates the video around the anchor point. The Rotation dial rotates 360 degrees in both directions, 0 being up, similar to the arrow in the GUI.
- Anchor Point: All geometric manipulations to the video occur relative to the anchor point. The default value (0, 0) represents the center of the video. For example, applying a rotation transform to a layer with the default anchor point causes the layer to rotate around its center. Changing the anchor point to a different location would cause the video to rotate around that new point.
- Offset: Offsets the video's position.
Graphical User Interface
- Hovering over the "+" shape will allow for selecting and adjusting the Position X/Y.
- Hovering over the "X" shape will allow for selecting and adjusting the Anchor Point X/Y.
- Hovering over the arrowhead will allow changing the rotation.
- Hovering over an area within the blue frame will allow for selecting and adjusting the Scale X/Y.
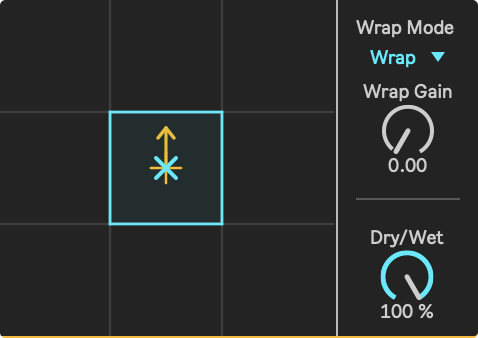
Parameters
- Wrap Mode:
- Wrap: Pixels wrap around the window borders, creating a tiled effect.
- Mirror: Pixels are mirrored beyond the window borders, creating a reflection effect.
- Clamp: Pixels are stretched beyond the window borders.
- Wrap Gain: Sets the gain of pixels beyond window borders, those affected by the Wrap Mode setting.
- Dry/Wet: Controls the balance between the unprocessed and processed video.
Video Monitor
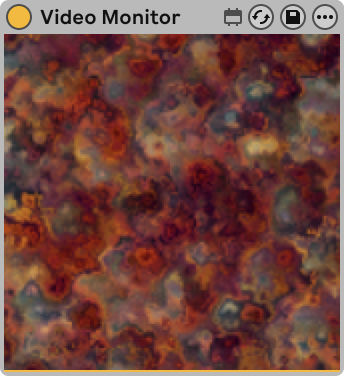
The Video Monitor device makes it possible to view video signals inside any track or chain.
Unlike other Videosync devices, Video Monitor relies on Max's Jitter objects. For this reason, Video Monitor does not work while operating in Networked Mode.
On Windows, you will need to configure the VIDDLL Max Package in order for Video Monitor to work.
Video Recorder
Record video from inside any track or chain, or place it on the Main Track to record the entire session. When Input is set to Chain, the device receives video output of any devices preceding it in the chain. Alternatively, you can select any Spout or Syphon source as input.
Record audio simultaneously with video. By default, the device records the output of any audio devices preceding it in the chain, but you can also select any other track or external input as audio source.
Recording is only supported while Live's audio engine is set to Sample Rate 44100 Hz or 48000 Hz.
Unlike other Videosync devices, Video Recorder relies on Max's Jitter objects. For this reason, Video Recorder does not work while operating in Networked Mode.
On Windows, you will need to configure the VIDDLL Max Package in order for Video Recorder to work.
Video Recorder leverages Max to record video, and Max does not support hardware acceleration for video encoding. For this reason, recording at high resolutions may not be possible on less powerful machines, and recording performance may vary greatly depending on the codec used. For more information, see the Recording Output section.
- Audio
- Video
Parameters
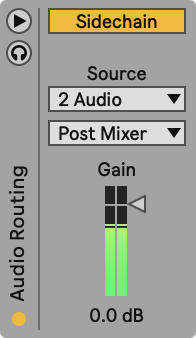
- Audio Routing Section: Use this toggle to show or hide Video Recorder's Audio Routing section.
- Listen to Input: Enable this toggle so that only the (sidechain) input is audible, including the effect of the Gain.
- External Sidechain: Use this toggle to turn the external sidechain input on or off.
- External Source: Select an external sidechain source.
- External Tapping Point: Selects the point at which the sidechain source's signal is tapped. In case "Ext. In" is selected as the source, this menu lists the available audio inputs of your audio interface.
- Recording Gain: Sets the audio gain for the (sidechain) input for recording.
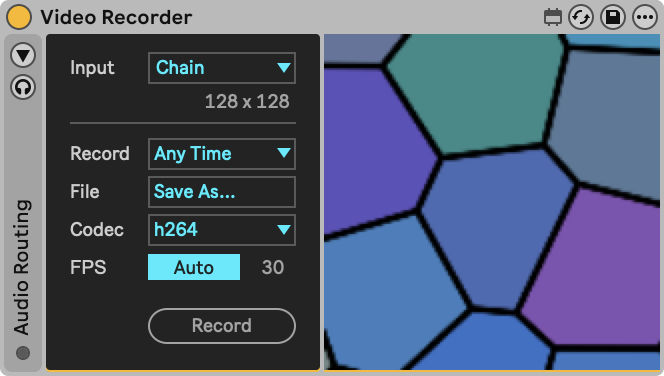
Parameters
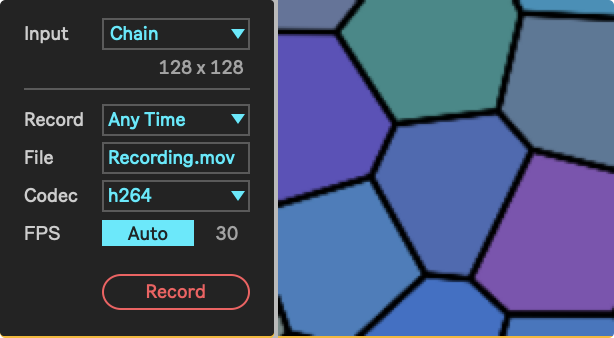
- Input: Select the video input for the recorder. While using Videosync, the "Chain" option will let Video Recorder automatically receive the video of the point in the chain the device is at.
- Record:
- Any Time: After a file destination is set, record at any time.
- While Playing: Allows for arming the recorder to automatically start and stop recording next time the transport starts and is stopped.
- Punch In/Out: Allows for arming the recorder to automatically start and stop recording at Live's Punch-In/Punch-Out Points.
- File: Click this field to choose a folder and set a file name for the recording. Setting a file destination is required before recording can commence. After recording is stopped, the same file name is automatically appended with an incrementing number to prevent overwriting the previous recording.
- Codec: Sets the codec for the recording.
- h264: Small file size, but most CPU-intensive and more likely to cause frame drops.
- JPEG: Larger files, but much lighter on the CPU and often more reliable for smooth recording.
- ProRes 422 (macOS only): High quality and edit-friendly. Much easier on the CPU than h264, often resulting in smoother recording (large file size).
- ProRes 4444 (macOS only): Highest quality ProRes option and supports alpha. Also easier on the CPU than h264, but creates very large files (usually overkill unless maximum quality or alpha is needed).
- FPS: While using Videosync, Auto mode will let the recorder automatically use the FPS from Videosync to set the FPS of the recorder. When using another source, use Custom to set a desired FPS.
- Record: Depending on the chosen recording mode, this button will Arm or Record. Once armed, the recorder will start and stop recording automatically once the conditions (While Playing or Punch-In/Out) are met. When the recording is stopped, the toggle will show a text notifying whether the recording was saved successfully or not.
Voronoi
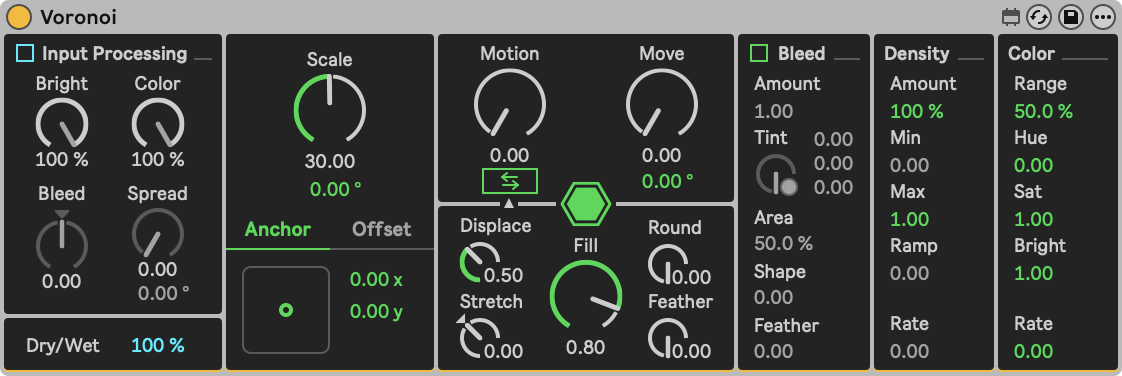
Voronoi is a hybrid between a generator and an effect. Based on the Voronoi algorithm it allows both the creation and manipulation of images in a wide range of ways.
- Input Processing
- Scale
- Shape
- Bleed
- Density
- Color
Parameters
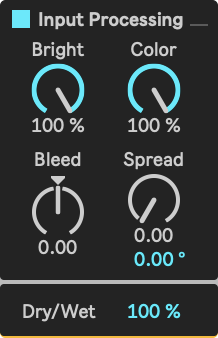
- Input Processing: Enable/disable input processing. Enabling input processing is more taxing for the GPU, and may result in a slight drop in frames per second.
- *Bright: Determines the influence of the incoming image brightness on the brightness of the voronoi cells.
- Color: Determines the influence of the incoming image color on the color of the voronoi cells.
- Bleed: Determines the influence of the incoming image brightness on the bleed amount between voronoi cells.
- Spread: Determines the scaling of the input image effects, per voronoi cell.
- Spread Angle: Determines the angle of the input image effects, per voronoi cell.
- Dry/Wet: Determines the dry/wet balance.
Parameters
- Scale: This adjusts the scale of the voronoi pattern, zooming in/out around the anchor point defined by 'Anchor X' and Anchor Y'.
- Angle: This rotates the voronoi pattern around the anchor point defined by 'Anchor X' and Anchor Y'.
- Anchor/Offse:t Determines if the Anchor tab or the Offset tab is displayed.
- Anchor X: This sets the X coordinate of the anchor around which scaling, rotation and stretching occurs.
- Anchor Y: This sets the Y coordinate of the anchor around which scaling, rotation and stretching occurs.
- Offset X: This shifts the voronoi pattern left/right. The amount of shifting is multiplied with the amount set in 'Offset Multiplier'.
- Offset Y: This shifts the voronoi pattern up/down. The amount of shifting is multiplied with the amount set in 'Offset Multiplier'.
- Offset Mult: This multiplies the impact of 'Offset X' and 'Offset Y'.
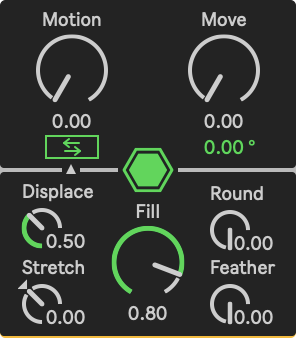
Parameters
- Motion: This defines the speed at which the voronoi cell displacement changes over time. This effect is only visible when Displace is set to a value higher than 0.
- Motion Rev: This reverses the direction of Motion. This effect is only visible when Displace is set to a value higher than 0.
- Move: This defines the speed at which the pattern moves in the direction defined by 'Move Angle'.
- Move Angle: This defines the angle at which the pattern moves at the speed defined by 'Move'.
- Voronoi Mode: This toggles the display mode for the voronoi pattern between Polygonal (based on cell boundaries) and Circular (based on cell points).
- Fill: This controls the size of the visible area of the voronoi cells. In Circular mode, it determines how much of the cell is visible starting from the voronoi points outward. In Polygonal mode, the Size parameter determines the size of the voronoi intersection borders: smaller sizes result in larger borders.
- Displace: This defines the voronoi cell displacement relative to its original hexagonal state.**
- Stretch: This modifies the distances between voronoi cells by either stretching them further apart or squeezing them closer together, centered on the anchor point determined by 'Anchor X' and 'Anchor Y'.
- Edge Rounding: In Polygonal mode, this controls the level of border rounding for voronoi cells.
- Edge Feathe:r This controls the feathering of voronoi cells, causing them to darken gradually towards their boundaries.
Parameters
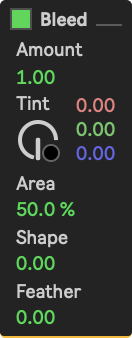
- Bleed: Enable/disable Bleed and Bleed Tins effects. Enabling Bleed is more taxing for the GPU, and may result in a slight drop in frames per second.
- Amount: This defines the degree to which colors of neighbouring voronoi cells bleed into each other. This parameter also influences the visual patterns and the effects of the "Bleed Tint" parameters below.
- Red: This sets the Tint Color Red amount. The areas in which colors bleed into each other can be tinted according to the Tint parameters.
- Green: This sets the Tint Color Green amount. The areas in which colors bleed into each other can be tinted according to the Tint parameters.
- Blue: This sets the Tint Color Blue amount. The areas in which colors bleed into each other can be tinted according to the Tint parameters.
- Tint: This sets the alpha amount for the Tint color. The areas in which colors bleed into each other can be tinted according to the Tint parameters. Alpha amount defines how much of this color is visible.
- Area: This determines the size of the tinted portion within the color bleeding domains.
- Shape: This determines which subsection of the color bleeding domains is tinted.
- Feather: This controls how smooth the gradient is from the regular voronoi patterns into the Bleed Tint Color.
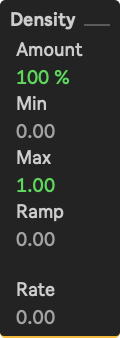
Parameters
- Amount: This determines which percentage of the voronoi cells are fully visible.
- Minimum: This determines the minimum visibility of the voronoi cells.
- Maximum: This determines the maximum visibility of the voronoi cells.
- Ramp: This determines the relative transition time between minimum and maximum visibility values.
- Rate: This controls the rate at which the visibility values alternate between the minimum and maximum values within voronoi cells.
Parameters
- Range: This determines the variety of voronoi cell colors.
- Hue: This sets the hue offset of voronoi cell colors.
- Sat: This sets the saturation of voronoi cell colors.
- Bright: This sets the brigthness of voronoi cell colors.
- Rate: This controls the rate at which color values within voronoi cells alternate.
Wavvy
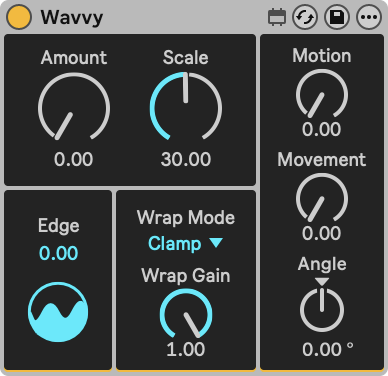
A displacement video effect capable of enriching imagery by adding a variety of organically flowing and morphing distortions. Wavvy's distortions create gaps in the incoming video, which are filled by default. To reveal the gaps, lower the Wrap Gain amount.
Parameters
- Amount: Sets the amount of the Wavvy effect.
- Scale: Sets the scale for the Wavvy effect.
- Edge: This determines the amount of interpolation in the displacement pattern, with higher values giving more angular results.
- Level of Detailx: Switches between a less detailed, lighter processing and detailed, complex processing.
- Wrap Mode:
- Wrap: Pixels wrap around the window borders, creating a tiled effect.
- Mirror: Pixels are mirrored beyond the window borders, creating a reflection effect.
- Clamp: Pixels are stretched beyond the window borders.
- Wrap Gain: Sets the gain of pixels beyond window borders, those affected by the Wrap Mode setting.
- Motion: Adds motion to the displacement pattern.
- Movement: Adds directional movement to the displacement pattern.
- Angle: Sets the angle of the movement direction.