Fixture Patch
In the Fixture Patch you specify all connected fixtures and their address settings.
It is the first view you see when you open Beam. You can access it by clicking the first tab in the left sidebar, by using the keyboard shortcut CMD/CTRL + 1, or via Window > Fixture Patch.
While the Fixture Patch is in focus, patches can be saved by selecting the File menu, and then Save (CMD/Ctrl + S) or Save As... (CMD/Ctrl + Shift + S). Beam's Fixture Patch files have the .sbp extension.
Adding fixtures to the Patch
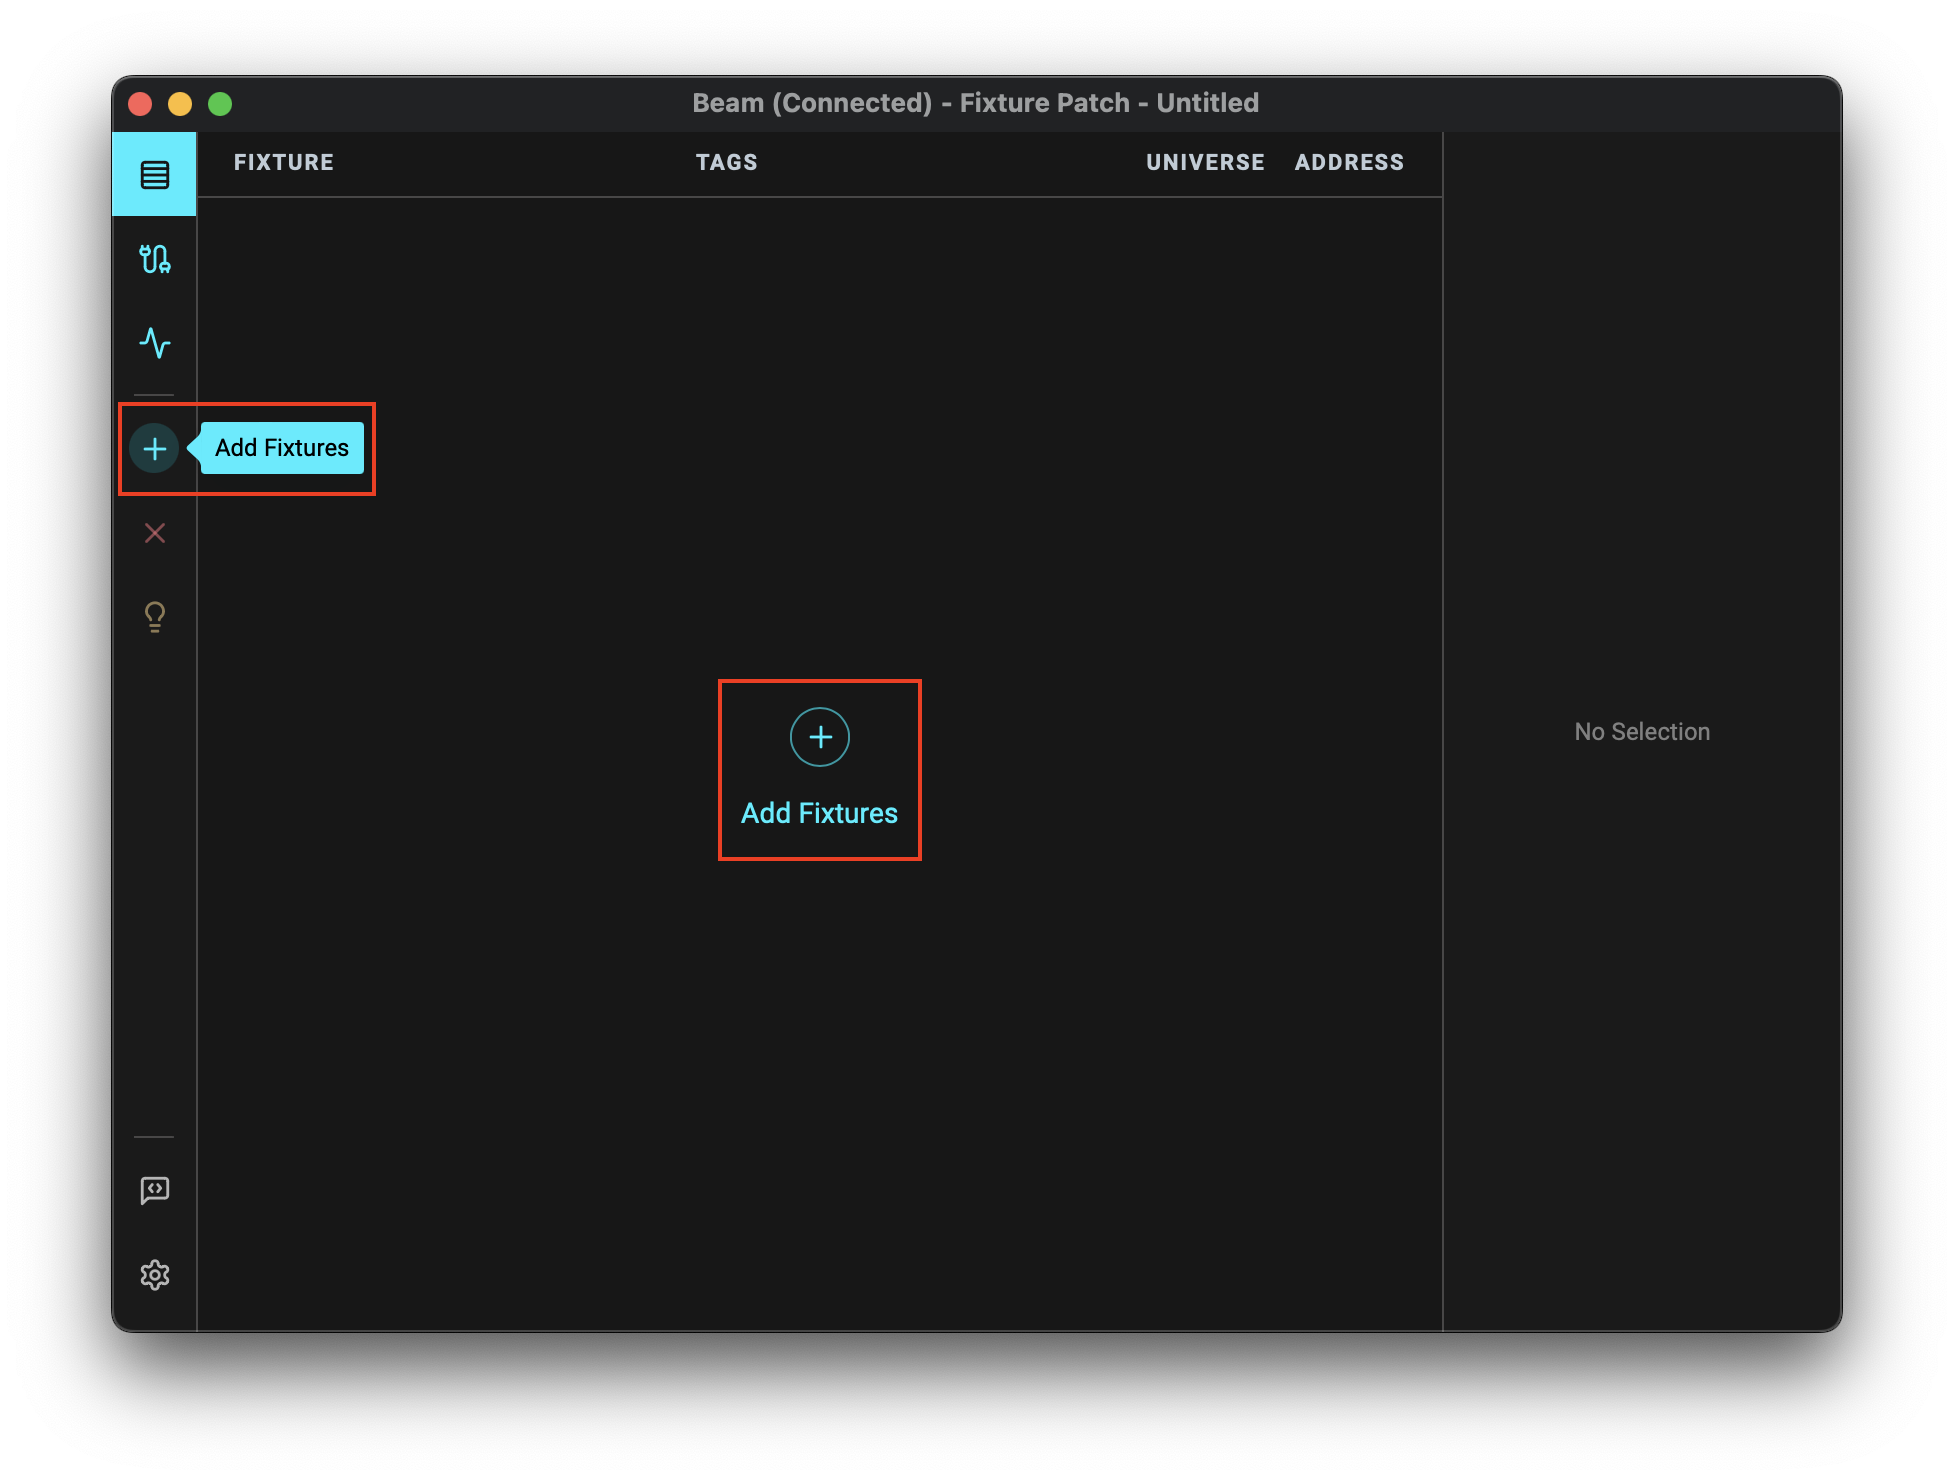
To add fixtures, press the Add Fixtures button in the left sidebar, or in the center of the interface (when the list is empty).

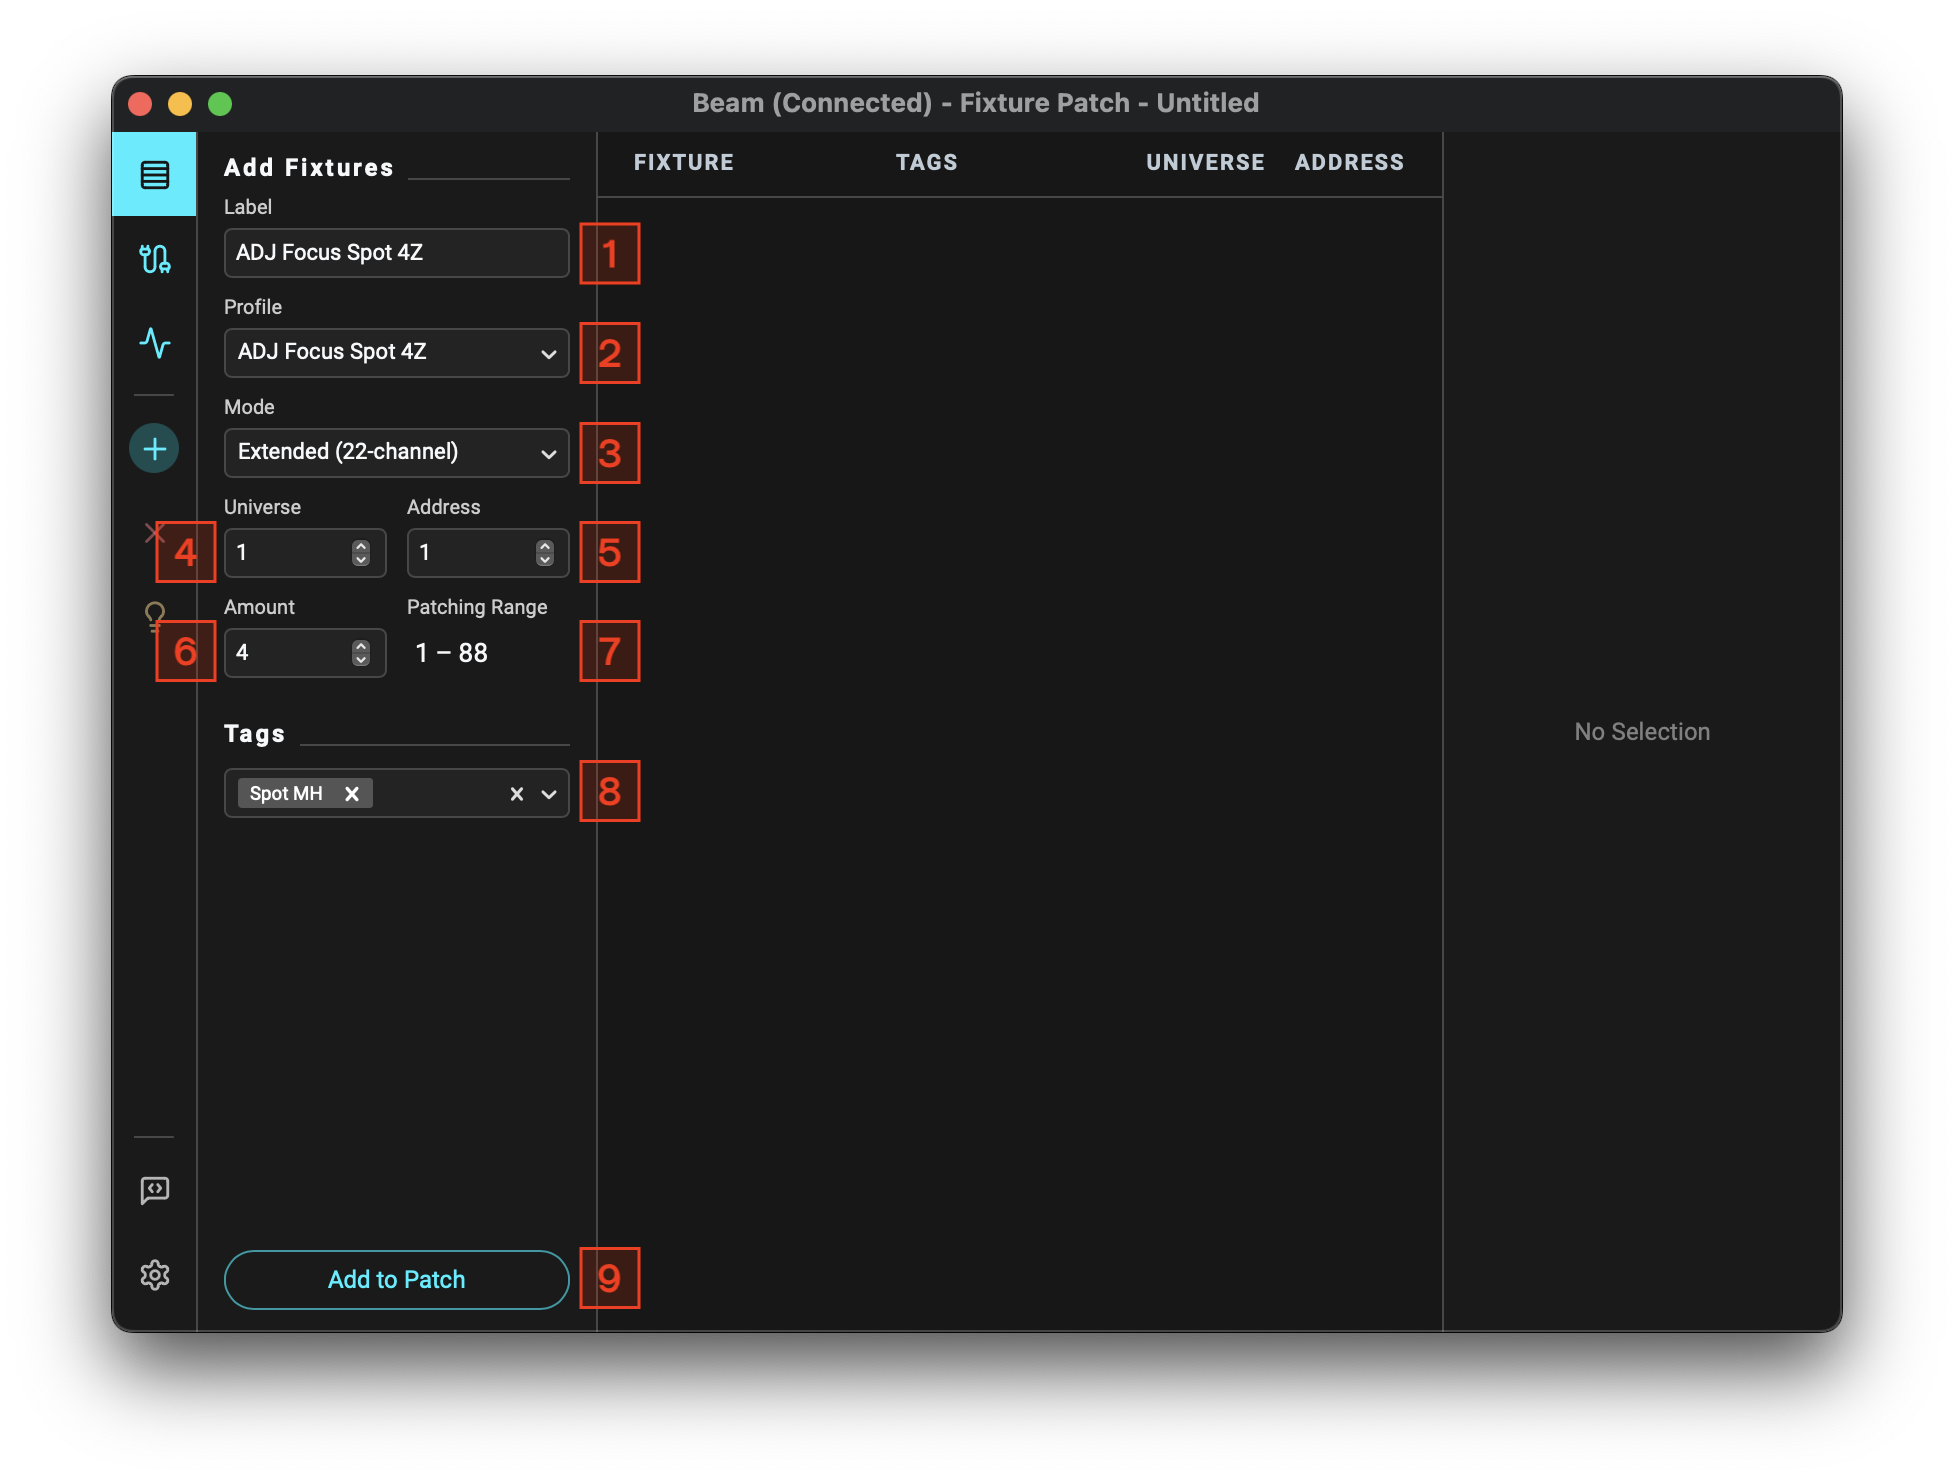
Pressing the Add Fixtures button opens a panel that lets you add one or more fixtures to the Fixture Patch.

- Label: An optional label for the fixture(s) you are adding. If this field is empty when you select a Profile, it will be auto-filled using the Profile's name.
- Profile: The fixture(s) you are adding.
Cannot find the profile for your fixture in this list? Submit a fixture profile request or create your own using the web fixture editor.
- Mode: The DMX channel mode your fixture(s) is/are set to.
- Universe: Internal Beam DMX Universe to which the fixture(s) will be patched.
- Address: Starting DMX address of the first fixture you are adding.
- Amount: The number of fixtures to add to the Fixture Patch. If you add multiple fixtures, their addresses will be patched sequentially, starting from the specified Address and incrementing based on the channel count of the selected Mode.
- Patching Range: The resulting DMX addresses of the fixtures you are adding. This field is read-only and shows the range of addresses that will be patched based on the Profile, Mode, Address and Amount fields.
- Tags: One or more Tags to assign to the fixtures being added. All Tags assigned to one or more fixtures will show up in the dropdown of Beam devices in Live. By selecting a Tag in a device, you specify which group of fixtures the device will control. Find more details about how this works under Signal Flow. A Tag can be a name that describes the type of fixtures (e.g.
LED ParorWash Moving Head), their role in a composition (e.g.Kick,Accents,Ambient,Lead), their physical location (e.g.Stage Front,Stage Back), or anything else that helps you organize your fixtures.
Editing fixtures in the Patch
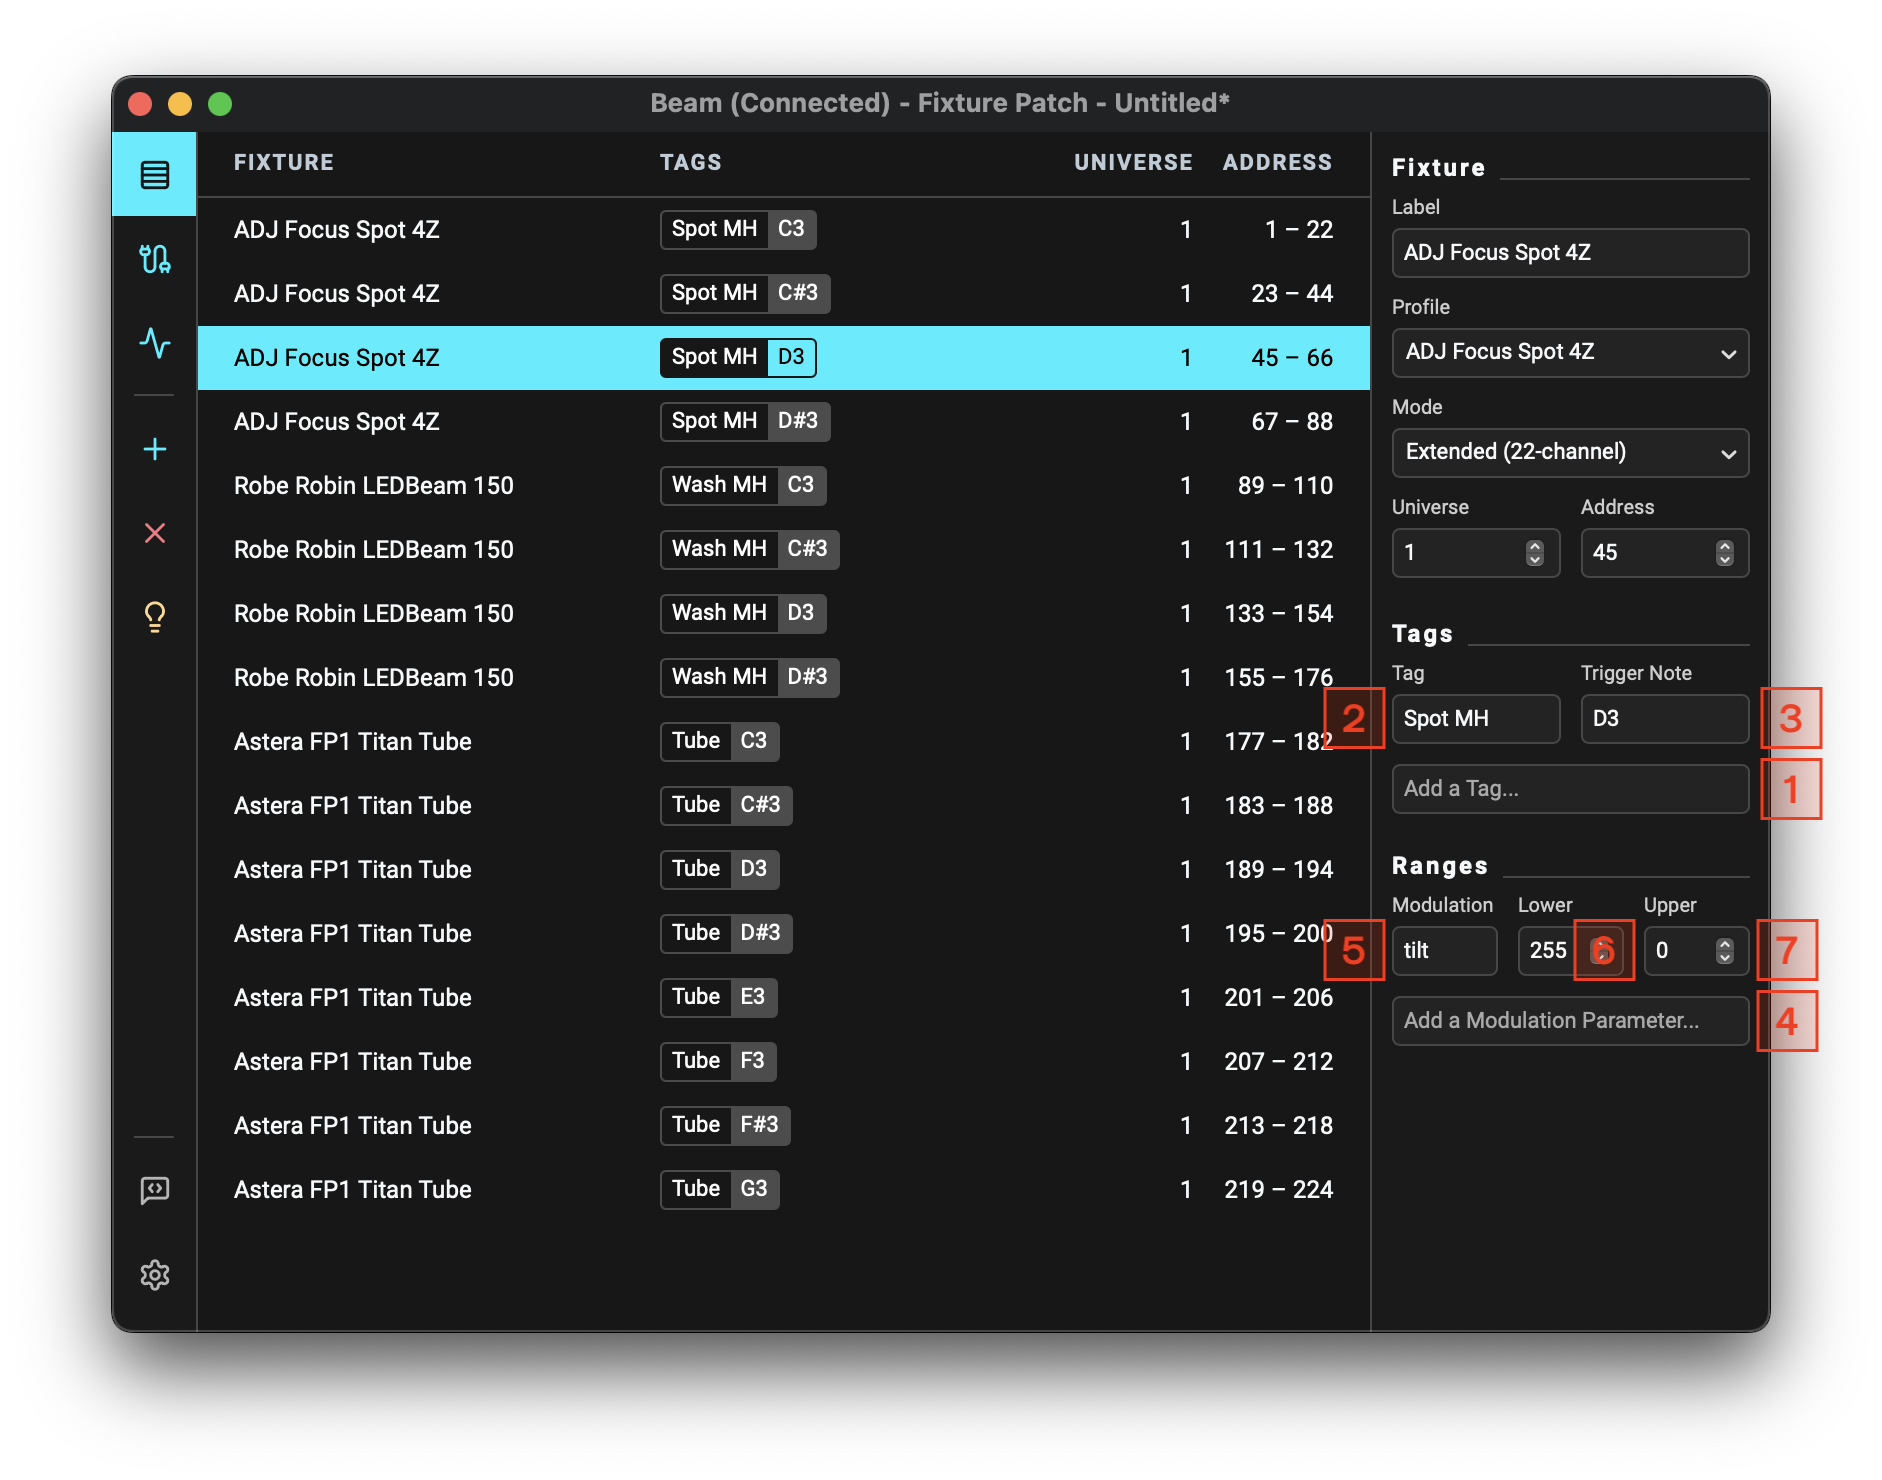
You can change the properties of a fixture by selecting it in the Fixture Patch list. The properties of the selected fixture are displayed in the Inspector panel on the right.

In addition to the properties you can set when adding fixtures, you can also edit the following:
- Add a Tag: Adds a new Tag to the fixture.
- Tag Name: Name of an existing Tag.
- Trigger Note: When using a Beam device with an envelope, this is the MIDI note that controls Intensity or another Modulation Parameter of the selected fixture. Usually, this note will be different for every fixture in a Tag group. When fixtures are added to the Patch, these notes are automatically assigned in ascending chromatic order, starting from C3 (60).
- Add a Modulation Parameter Range...: Adds a Range by specifying a Modulation Parameter. This scales a Modulation Parameter's values for this fixture to a specific DMX range. See Ranges for more information.
- Modulation Parameter: The Modulation Parameter that is being scaled by the Range.
- Lower Bound: The lower bound of the DMX range to which the Modulation Parameter is scaled. By default this is 0.
- Upper Bound: The upper bound of the DMX range to which the Modulation Parameter is scaled. By default this is 255.
You can edit values in a selection of multiple fixtures at once.
Fixtures with Cells
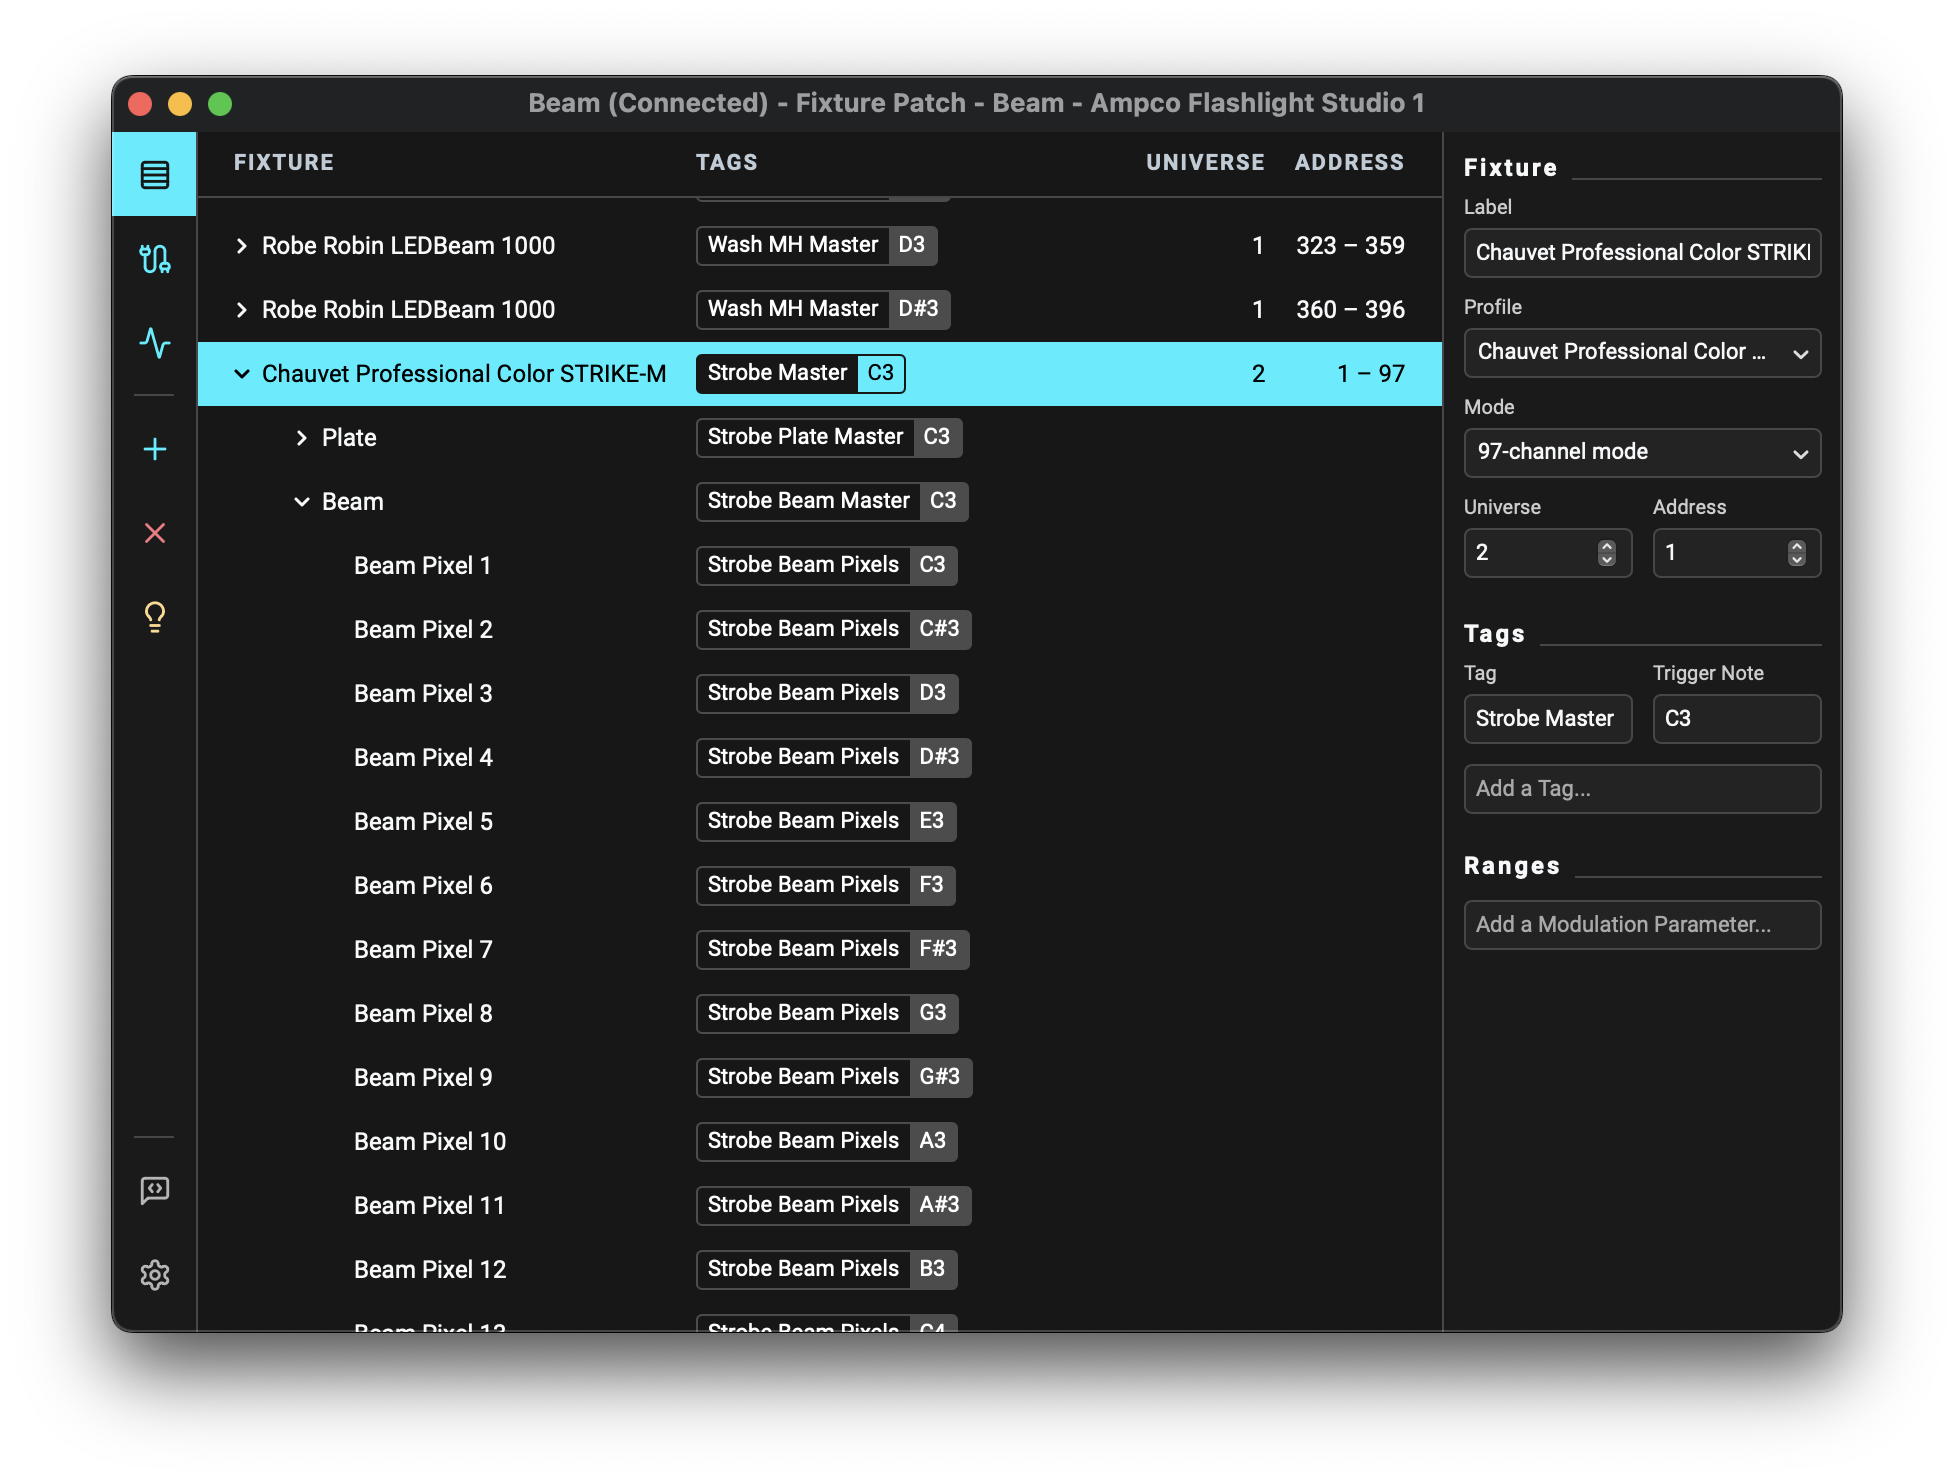
Beam supports fixtures with cells, such as pixel bars and fixtures with multiple fixture subgroups. You can recognize these fixtures by the arrow icon next to the fixture name in the Fixture Patch list. Clicking on the arrow will expand the fixture to show its Cells. Cells can have sub-cells, which can be expanded in the same way.

Each Cell can be addressed individually, by assigning Tags and Trigger Notes to them. When you select a Cell, the Inspector panel will show the properties of the selected Cell.