Installation
This guide shows you how to control a lighting set with Ableton Live using Beam. Whether you have actual fixtures at hand or not, we will show you how to connect to both virtual and real lighting rigs.
By the end of this article you will be able to reproduce the audiovisual composition from Beam for Live 2 Release Trailer in a virtual environment on your computer:
Downloading and first launch
- Download Beam 2 from our website.
- To install Beam:
- On macOS, open the Beam 2.dmg file and drag the Beam 2 application to your Applications folder.
- On Windows, open the downloaded Beam 2.msi file and go through the installation process by following the instructions in the application installer.
- Launch Ableton Live and Beam.
- As soon as Beam detects that Live is running, the User Library Installer will appear and guide you through the final installation process.
- As a last step, the User Library Installer will ask whether to open a Demo Set or not, closing the installer and completing the installation process.
User Library Installer
When starting Beam, as soon as it detects that Live is running, it will always check if the Showsync Control Surface, Beam Devices and the Demo Projects are installed in the Ableton Live User Library and whether they are still up to date. Whenever one of these conditions isn't met, the installer will launch itself.
Whenever this happens at startup, we recommend always going through the installation process to ensure all the latest versions are installed.
Installation steps
If the Showsync Control Surface is installed, selected and up to date, steps 1-3 are skipped.
- 1
- 2
- 3
- 4
- 5
- 6
- 7
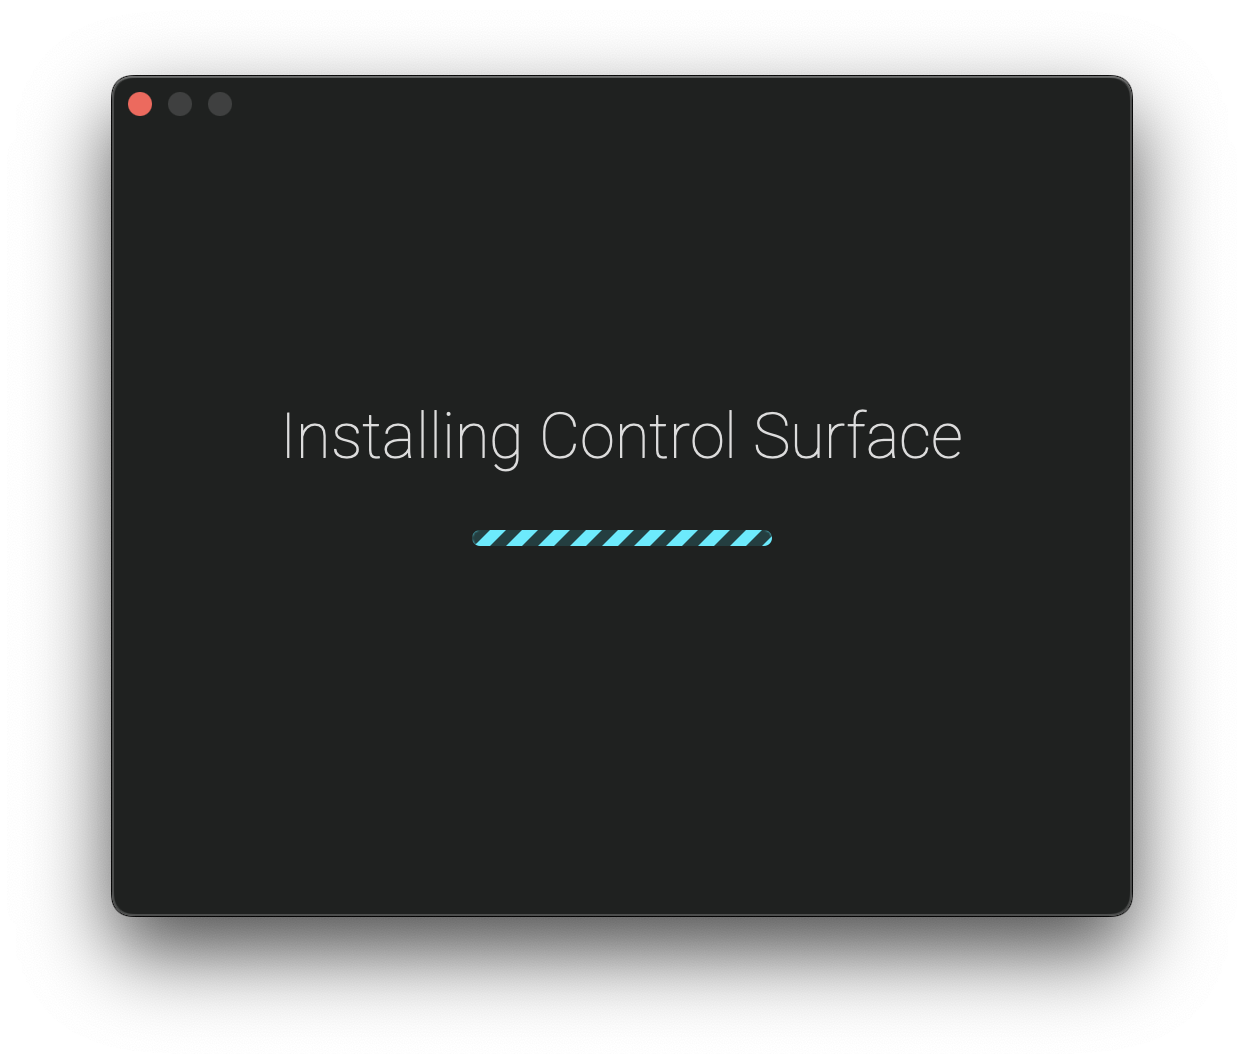
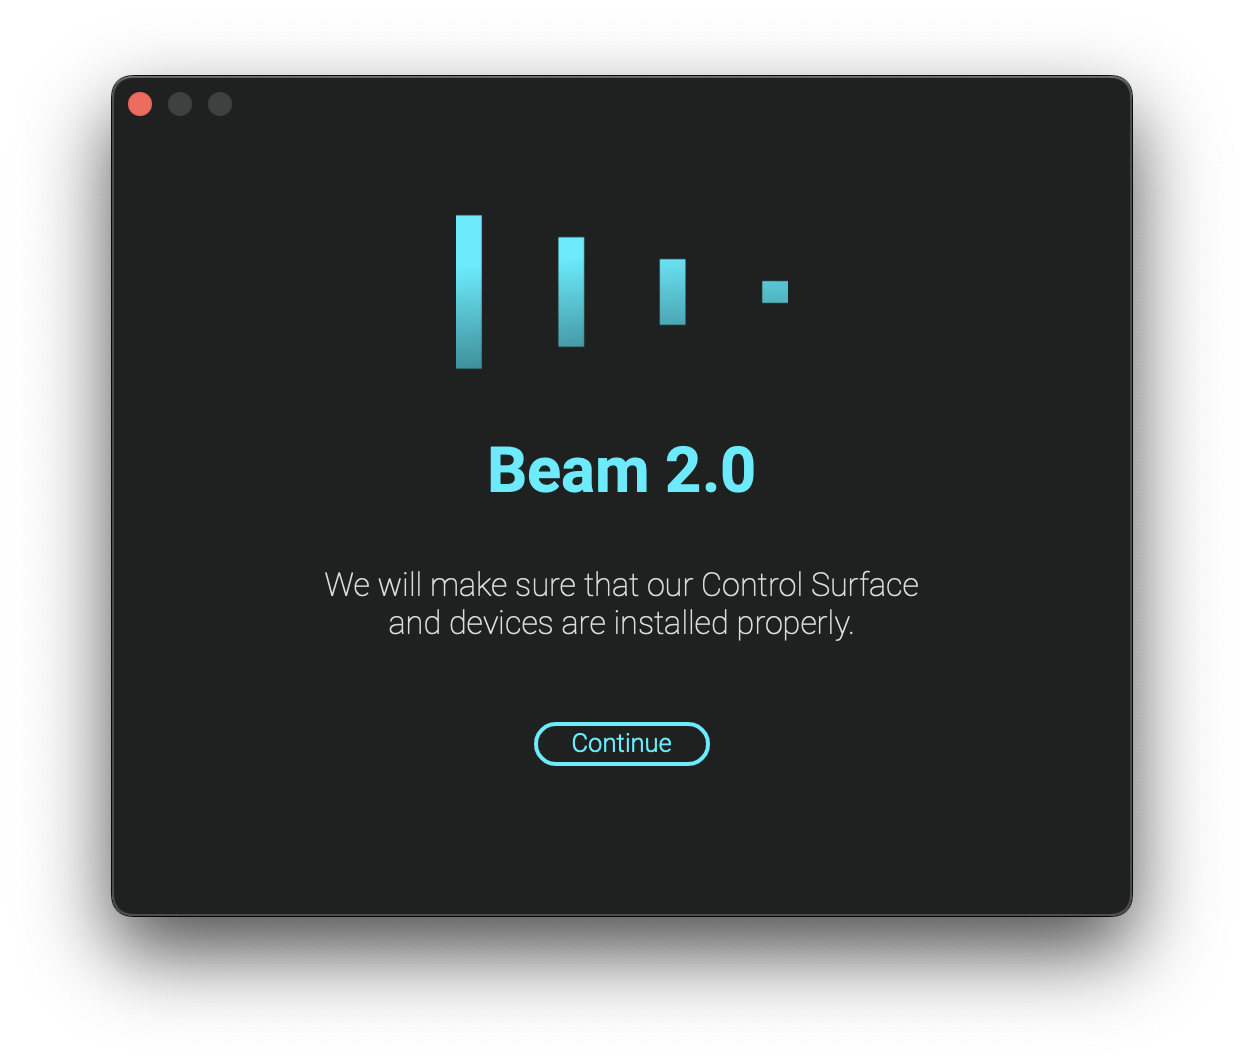
After clicking Continue on the initial screen, Beam first installs the Showsync Control Surface to User Library/Remote Scripts.
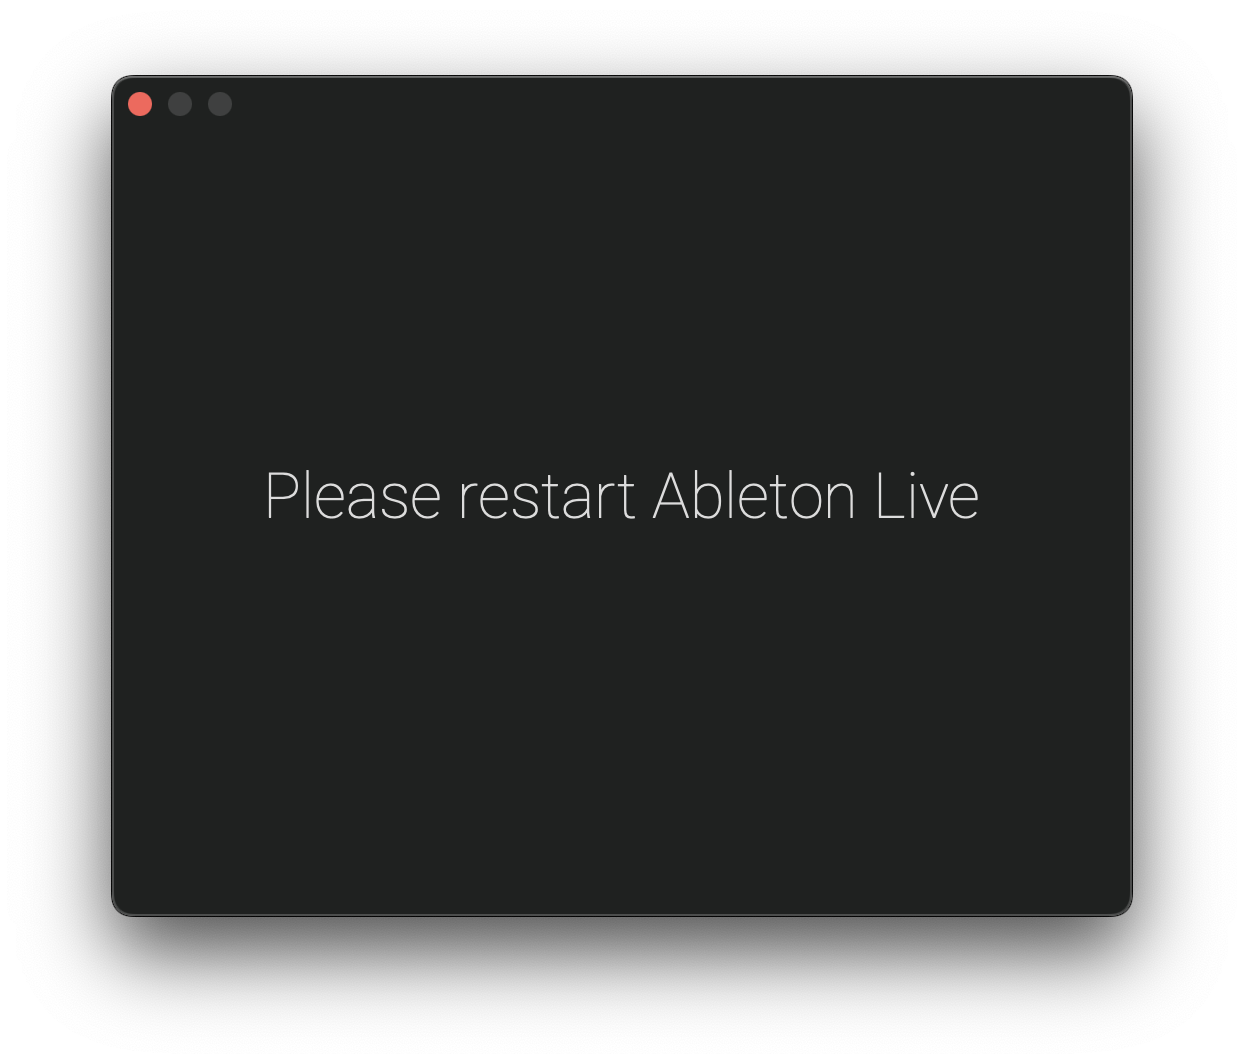
After completing step 1, you are instructed to restart Live. This is necessary for Live to detect the newly installed Control Surface, and for it to appear as an option in Live's Settings window for the next step.
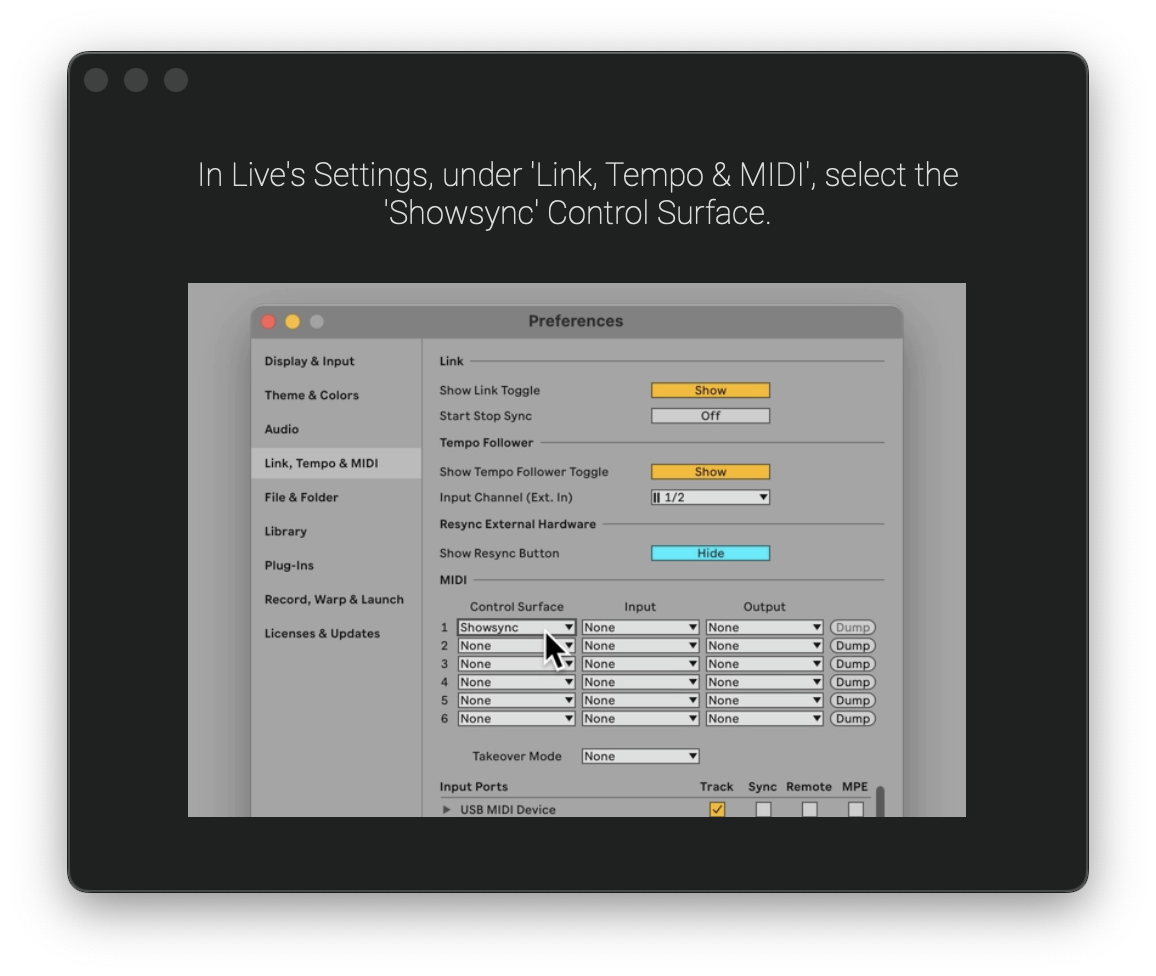
Once Live has restarted and Beam has detected this, the installer will show a video, demonstrating how to select the Showsync Control Surface in Live's Settings window.
After selecting the Control Surface in Live, Beam's application window should show the "Connected" status in its title bar, and the installer will continue completing the rest of the automated steps.
Beam's instruments and effects are installed to User Library/Beam/<a>.<b> Devices where <a> and <b> are the major and minor version numbers of the version being installed.
Each minor version of Beam has its own Devices folder.
The Demo Project is installed. The Demo Project is installed to User Library/Beam/<a>.<b> Demo Project where <a> and <b> are the major and minor version numbers of the version being installed.
Each minor version of Beam has its own Demo Project folder.
The Playground Project is installed. The Playground Project is installed to User Library/Beam/<a>.<b> Playground Project where <a> and <b> are the major and minor version numbers of the version being installed.
Each minor version of Beam has its own Playground Project folder.

The User Library Installer will ask whether to open the Demo Set, closing the installer and completing the installation process.
Confirming connection with Live
When both Beam and Ableton Live are running, Beam will automatically connect to your Live Set. There are several ways to confirm whether the connection is established:
- The title of the Beam's Application window reads "Connected".
- The Console window (
CMD/CTRL+K) prints a message to confirm the connection is established. - On macOS, the Beam icon in the menu bar becomes solid when there is a connection.
Playing the Demo Set
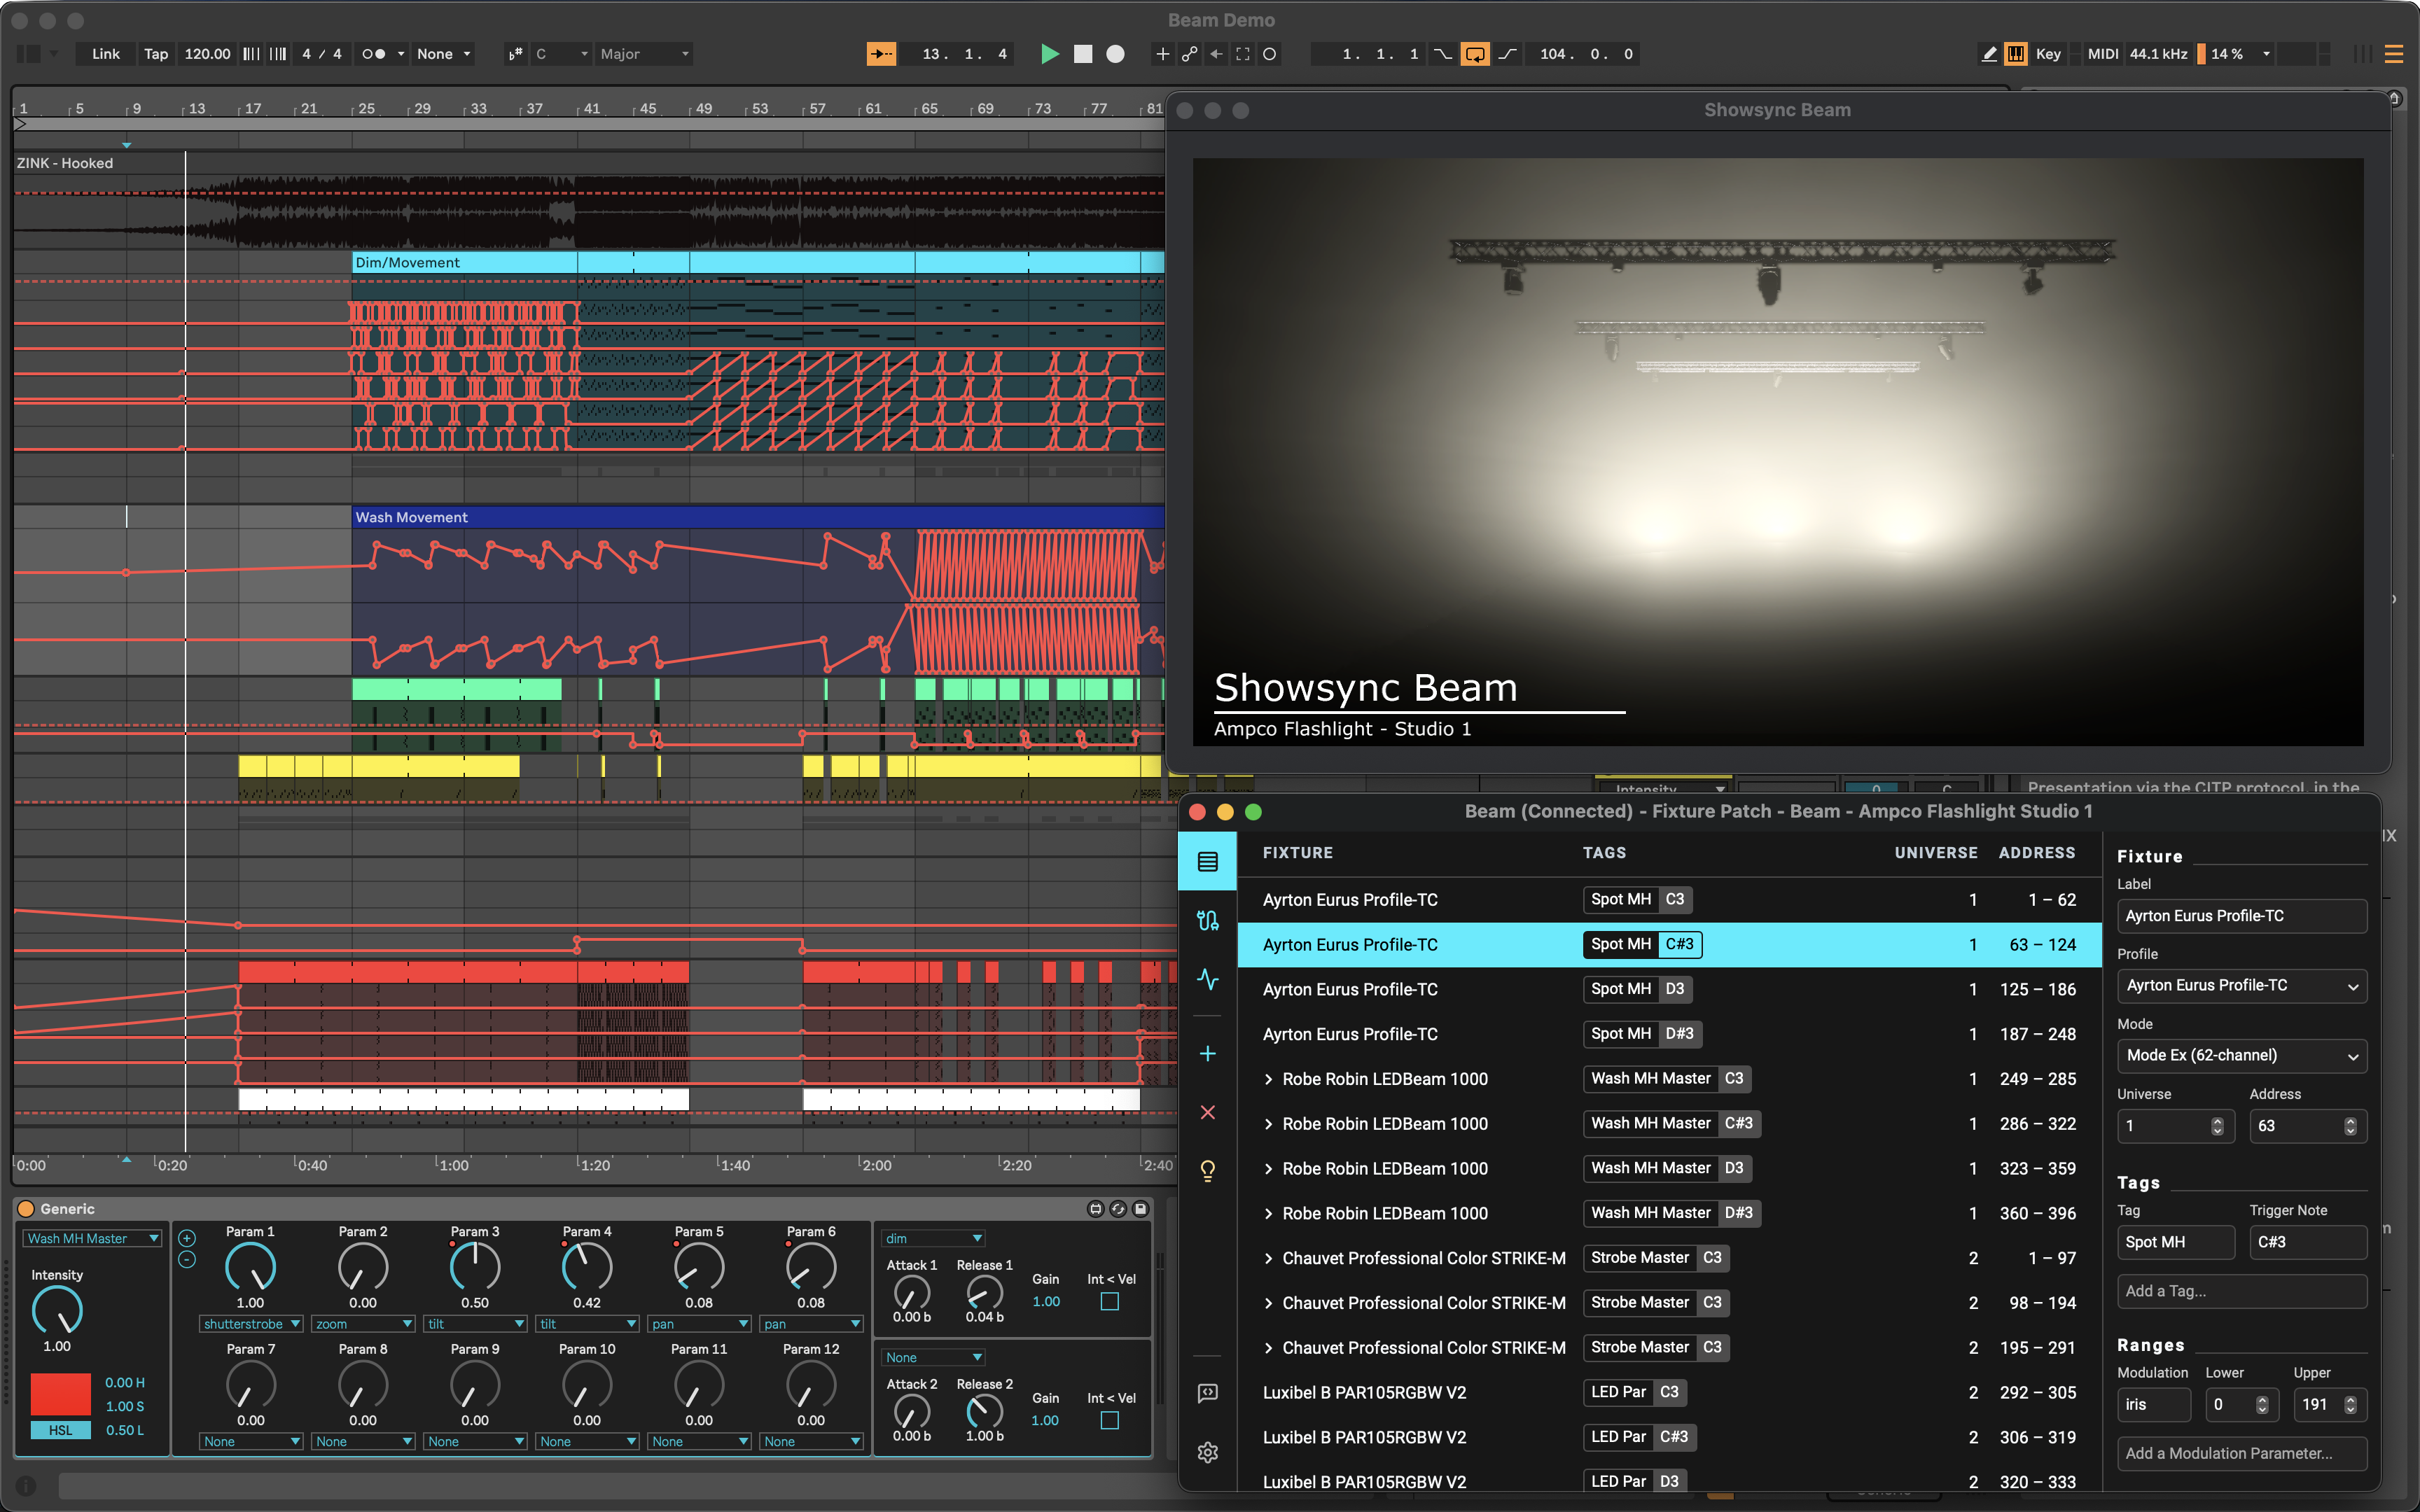
If you chose to open the Demo Set at the end of the installation process, you will notice:
- Beam has loaded the Fixture Patch
Beam - Ampco Flashlight Studio 1 - a visualizer application has started
Beam DemoLive Set has opened in Live- in the background Beam also loaded an Inputs/Outputs configuration to connect to the visualizer application
Arrange the windows next to each other and press Play in Live to experience the audiovisual composition, with Beam controlling virtual fixtures in the visualizer.
You can always open the Demo Set later by navigating to Beam > Demo Project... (macOS) or Options > Open Demo Project (Windows) in the menu bar.